Load Data Into Cosmos DB with ADF
In this lab, you will populate an Azure Cosmos DB container from an existing set of data using tools built in to Azure. After importing, you will use the Azure portal to view your imported data.
Before you start this lab, you will need to create an Azure Cosmos DB database and container that you will use throughout the lab. You will also use the Azure Data Factory (ADF) to import existing data into your container.
Create Azure Cosmos DB Database and Container
You will now create a database and container within your Azure Cosmos DB account.
-
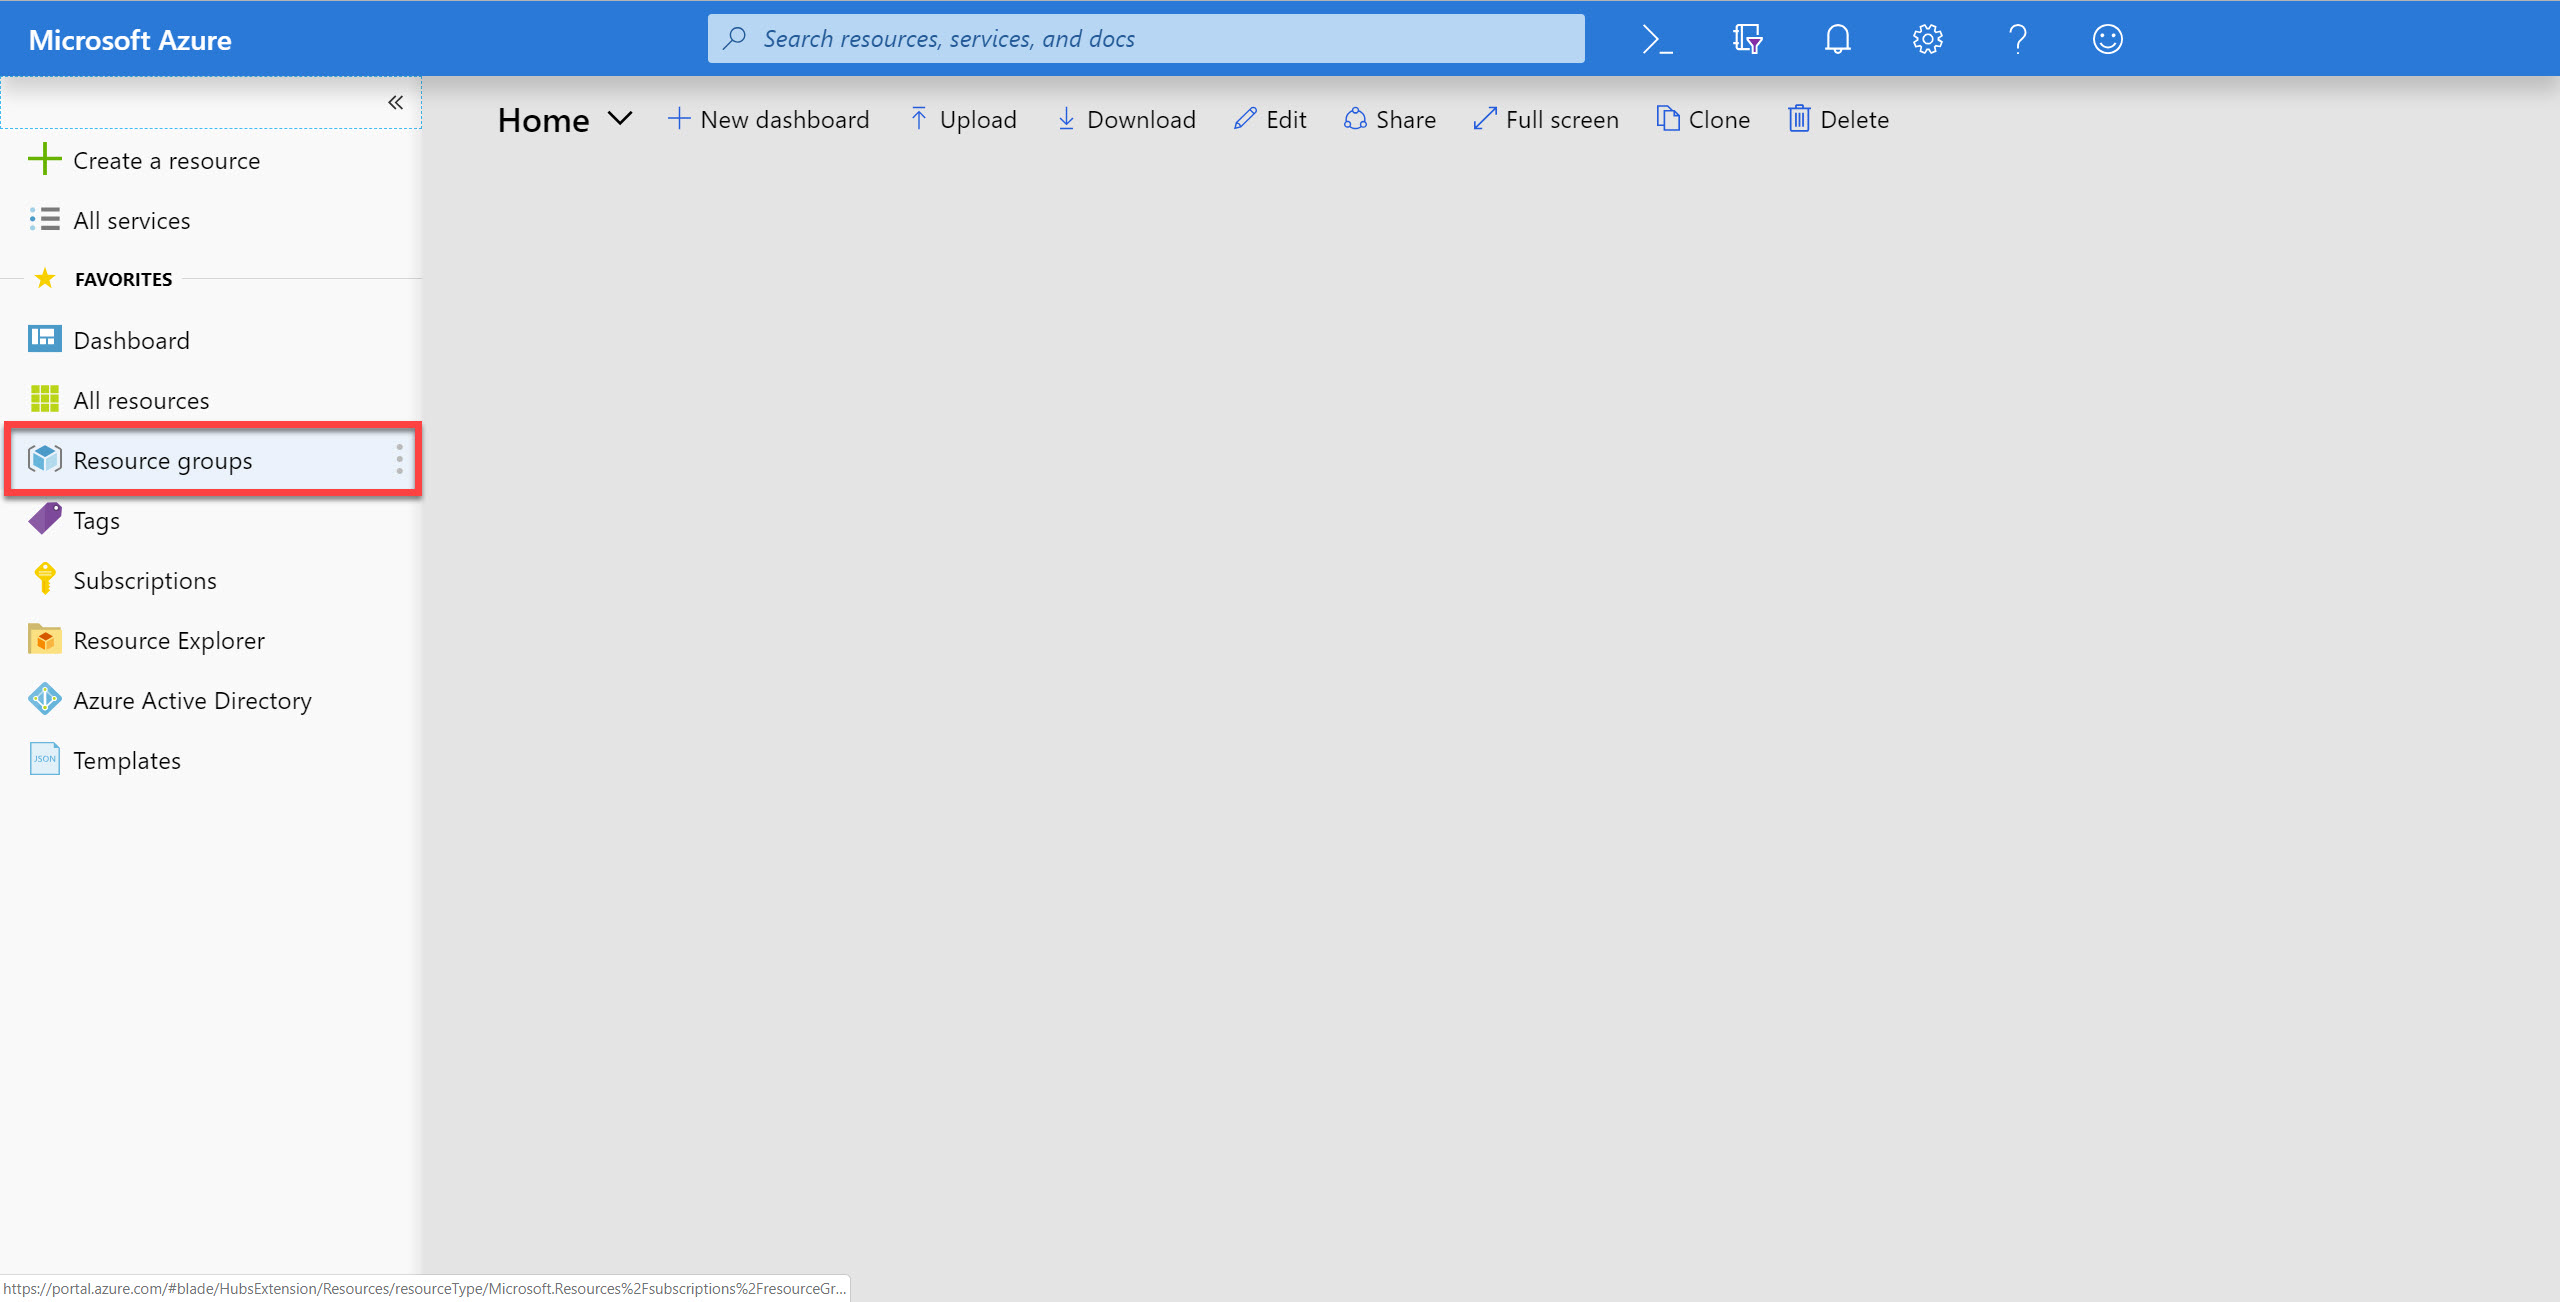
On the left side of the portal, click the Resource groups link.
-
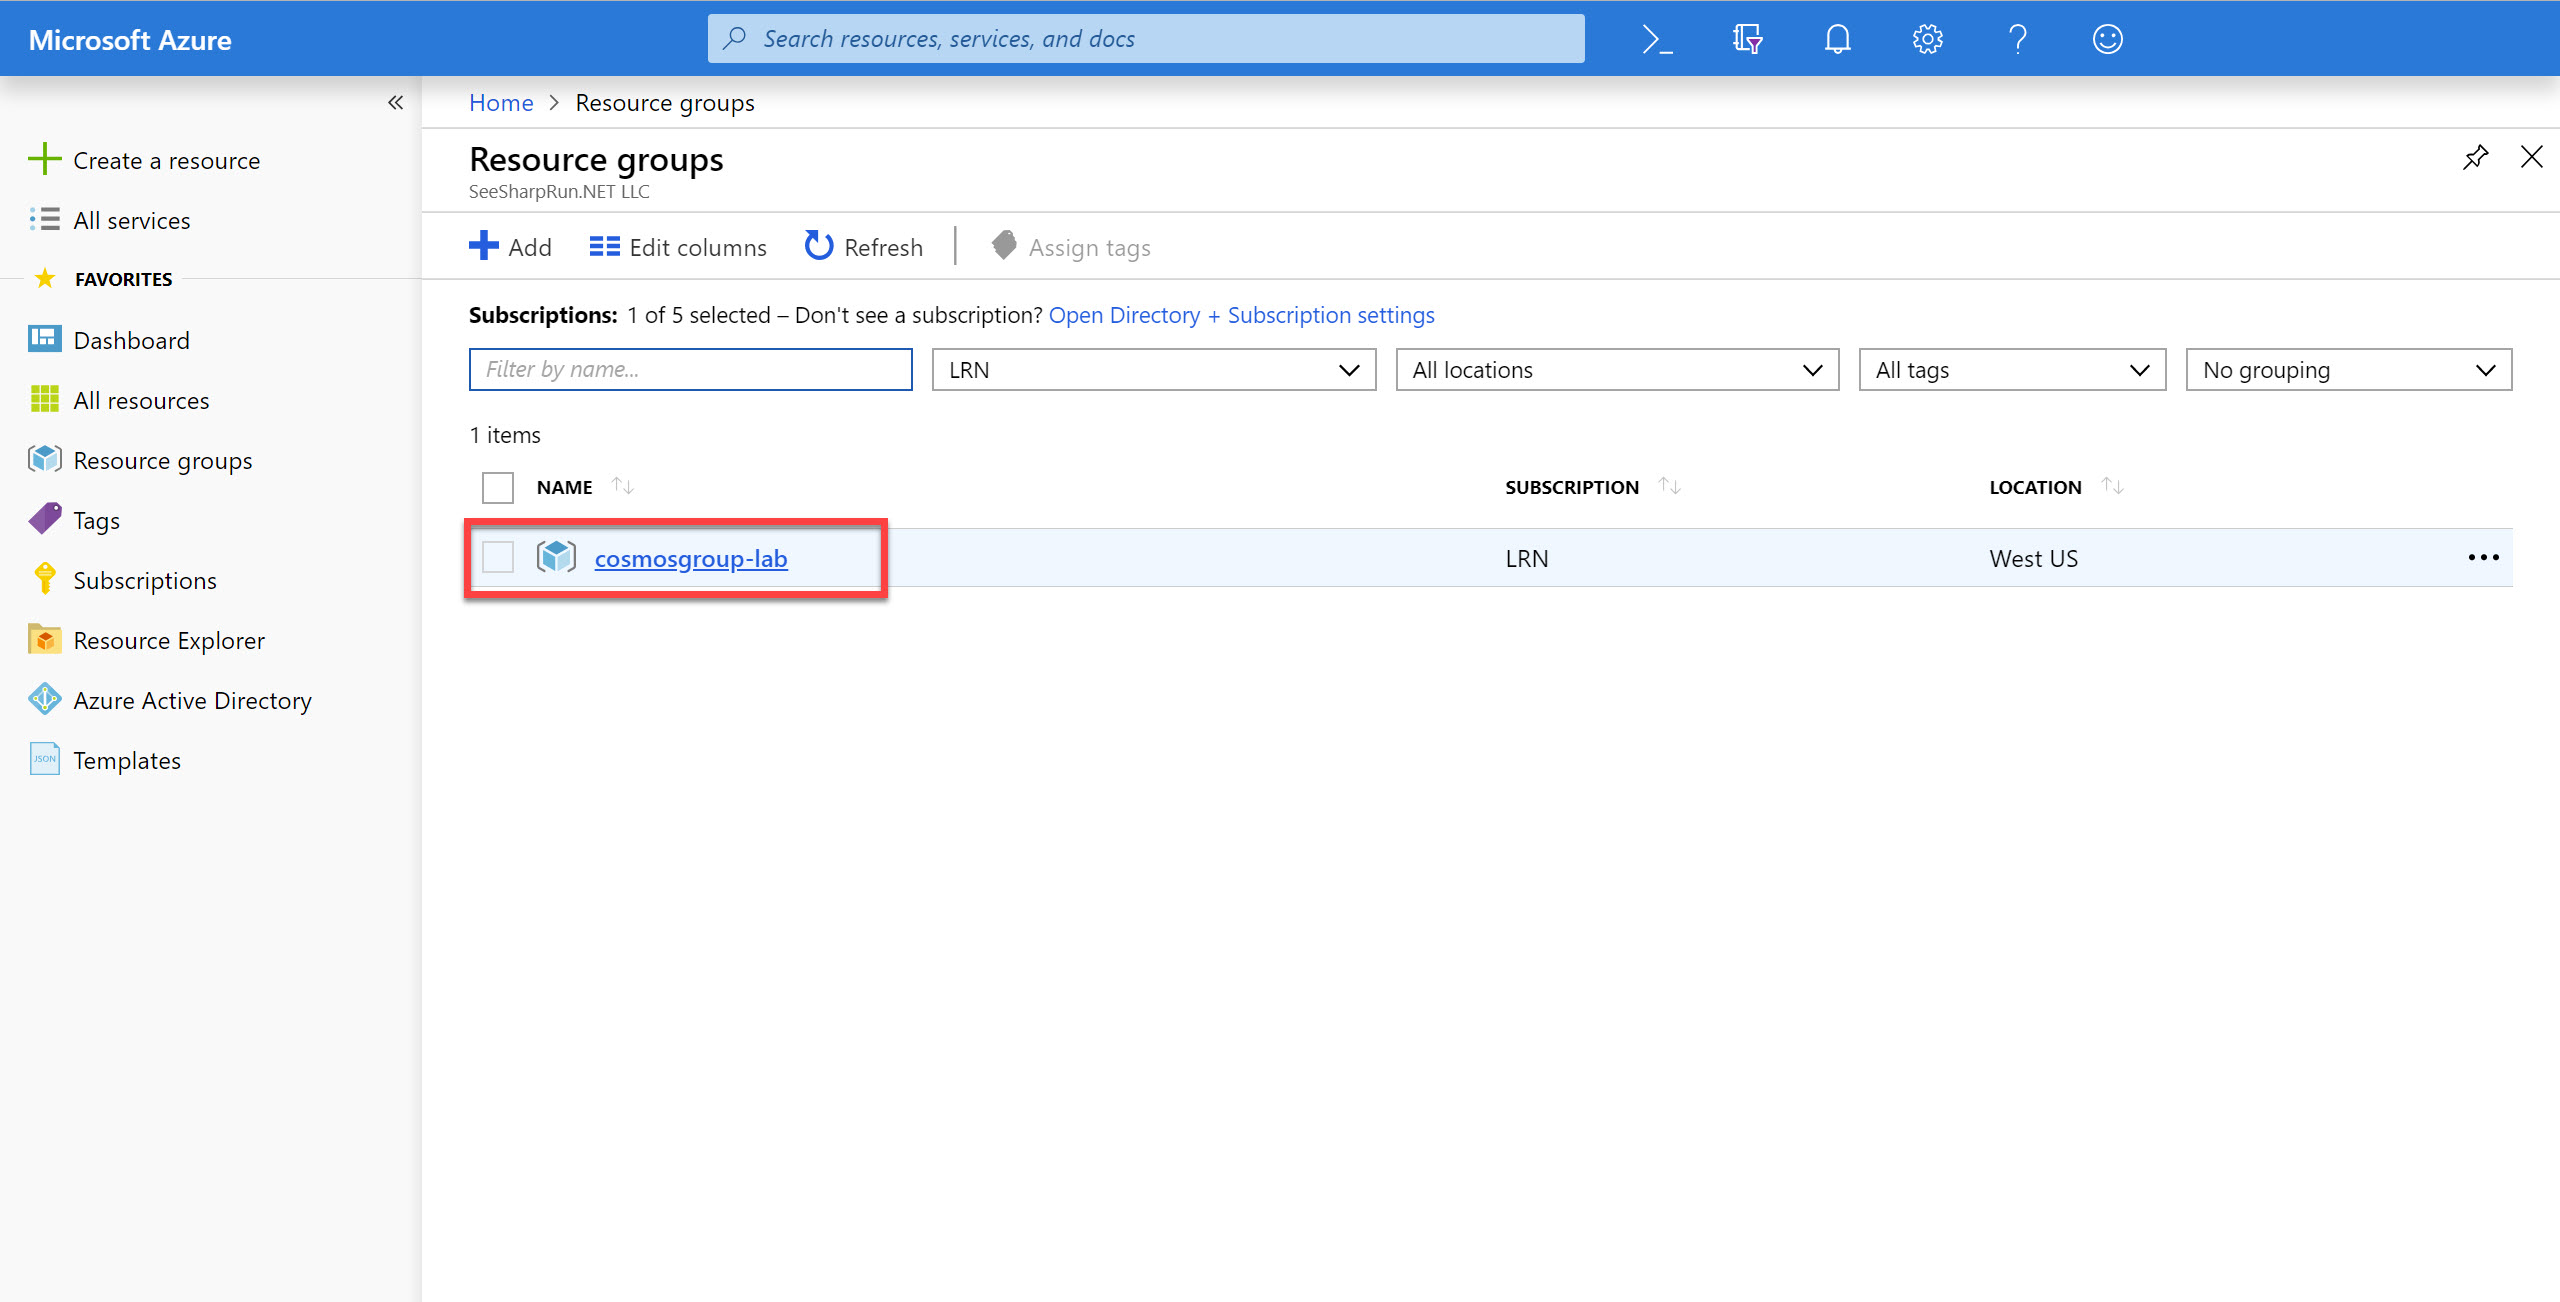
In the Resource groups blade, locate and select the cosmoslabs Resource Group.
-
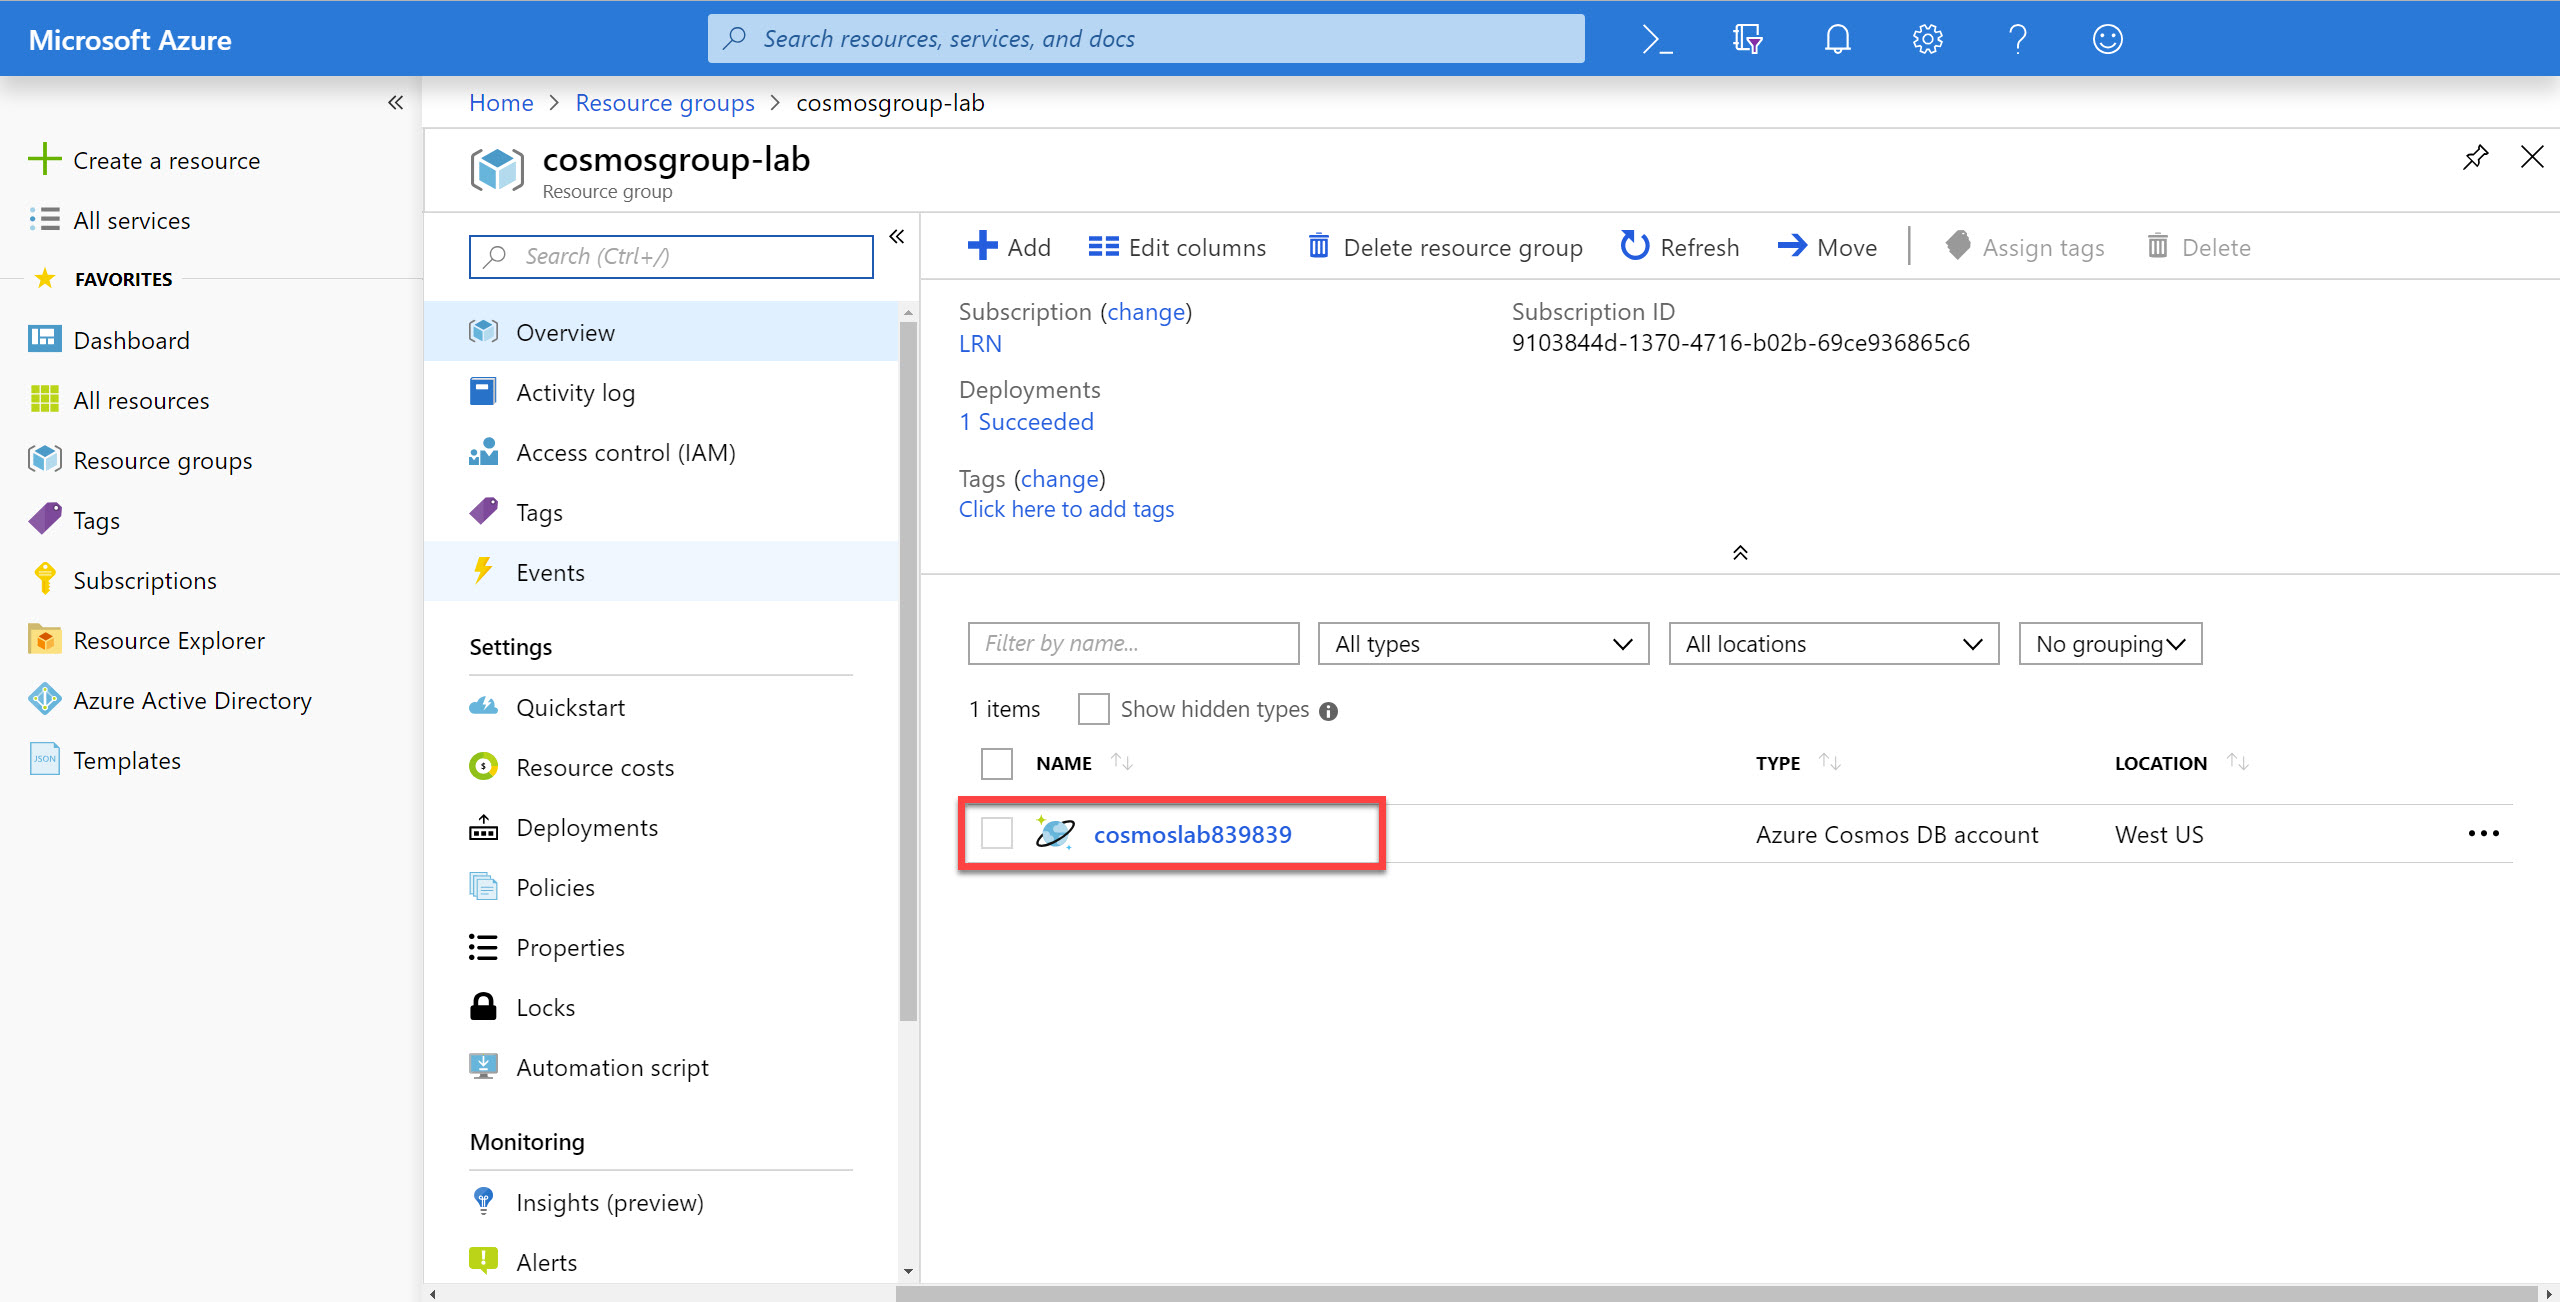
In the cosmoslabs blade, select the Azure Cosmos DB account you recently created.
-
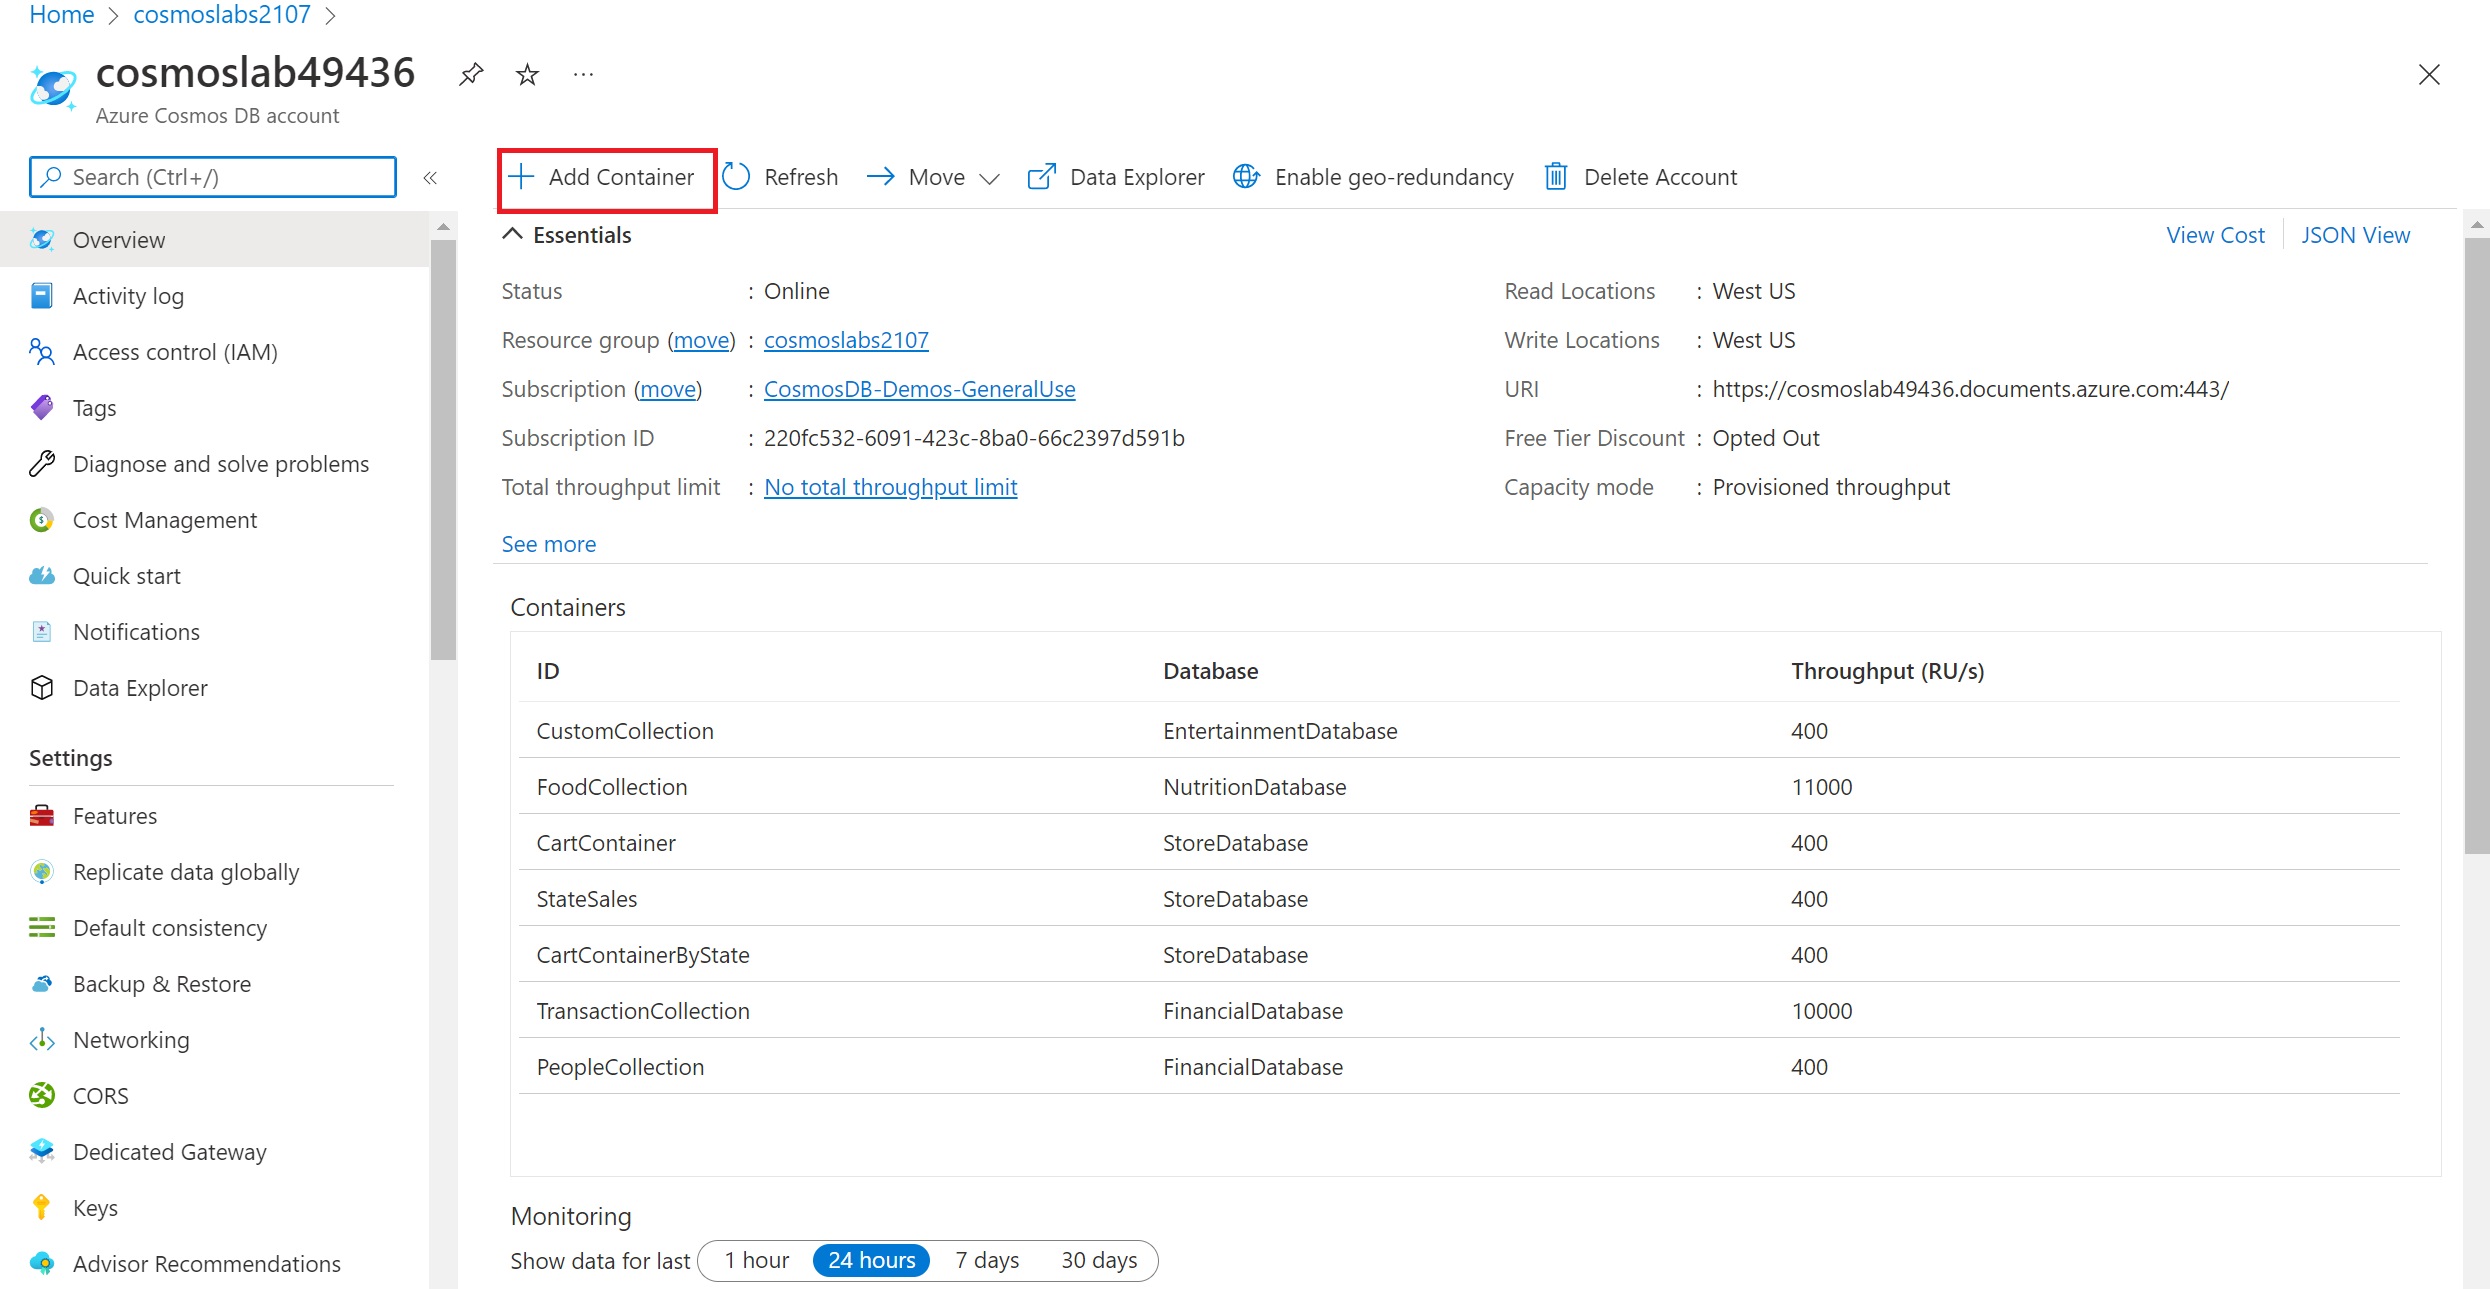
In the Azure Cosmos DB blade, locate and click the Overview link on the left side of the blade. At the top click the Add Container button.
-
In the Add Container popup, perform the following actions:
-
In the Database id field, select the Create new option and enter the value ImportDatabase.
-
Do not check the Share throughput across containers option.
Share throughput across containers option for a database allows you to share the throughput among all the containers that belong to that database. Within an Azure Cosmos DB database, you can have a set of containers which shares the throughput as well as containers, which have dedicated throughput.
-
In the Container Id field, enter the value FoodCollection.
-
In the Partition key field, enter the value
/foodGroup. -
In the Container throughput (autoscale) field, select Manual option.
-
In the Container Max RU/s field, enter the value
11000. -
Click the OK button.
-
-
Wait for the creation of the new database and container to finish before moving on with this lab.
Import Lab Data Into Container
You will use Azure Data Factory (ADF) to import the JSON array stored in the nutrition.json file from Azure Blob Storage. If you are completing the lab through Microsoft Hands-on Labs, you can use the pre-created Data Factory within your resource group. You do not need to do Steps 1-4 in this section and can proceed to Step 5 by opening your Data Factory (named importNutritionData with a random number suffix).
-
On the left side of the portal, click the Resource groups link.
To learn more about copying data to Cosmos DB with ADF, please read ADF’s documentation.
-
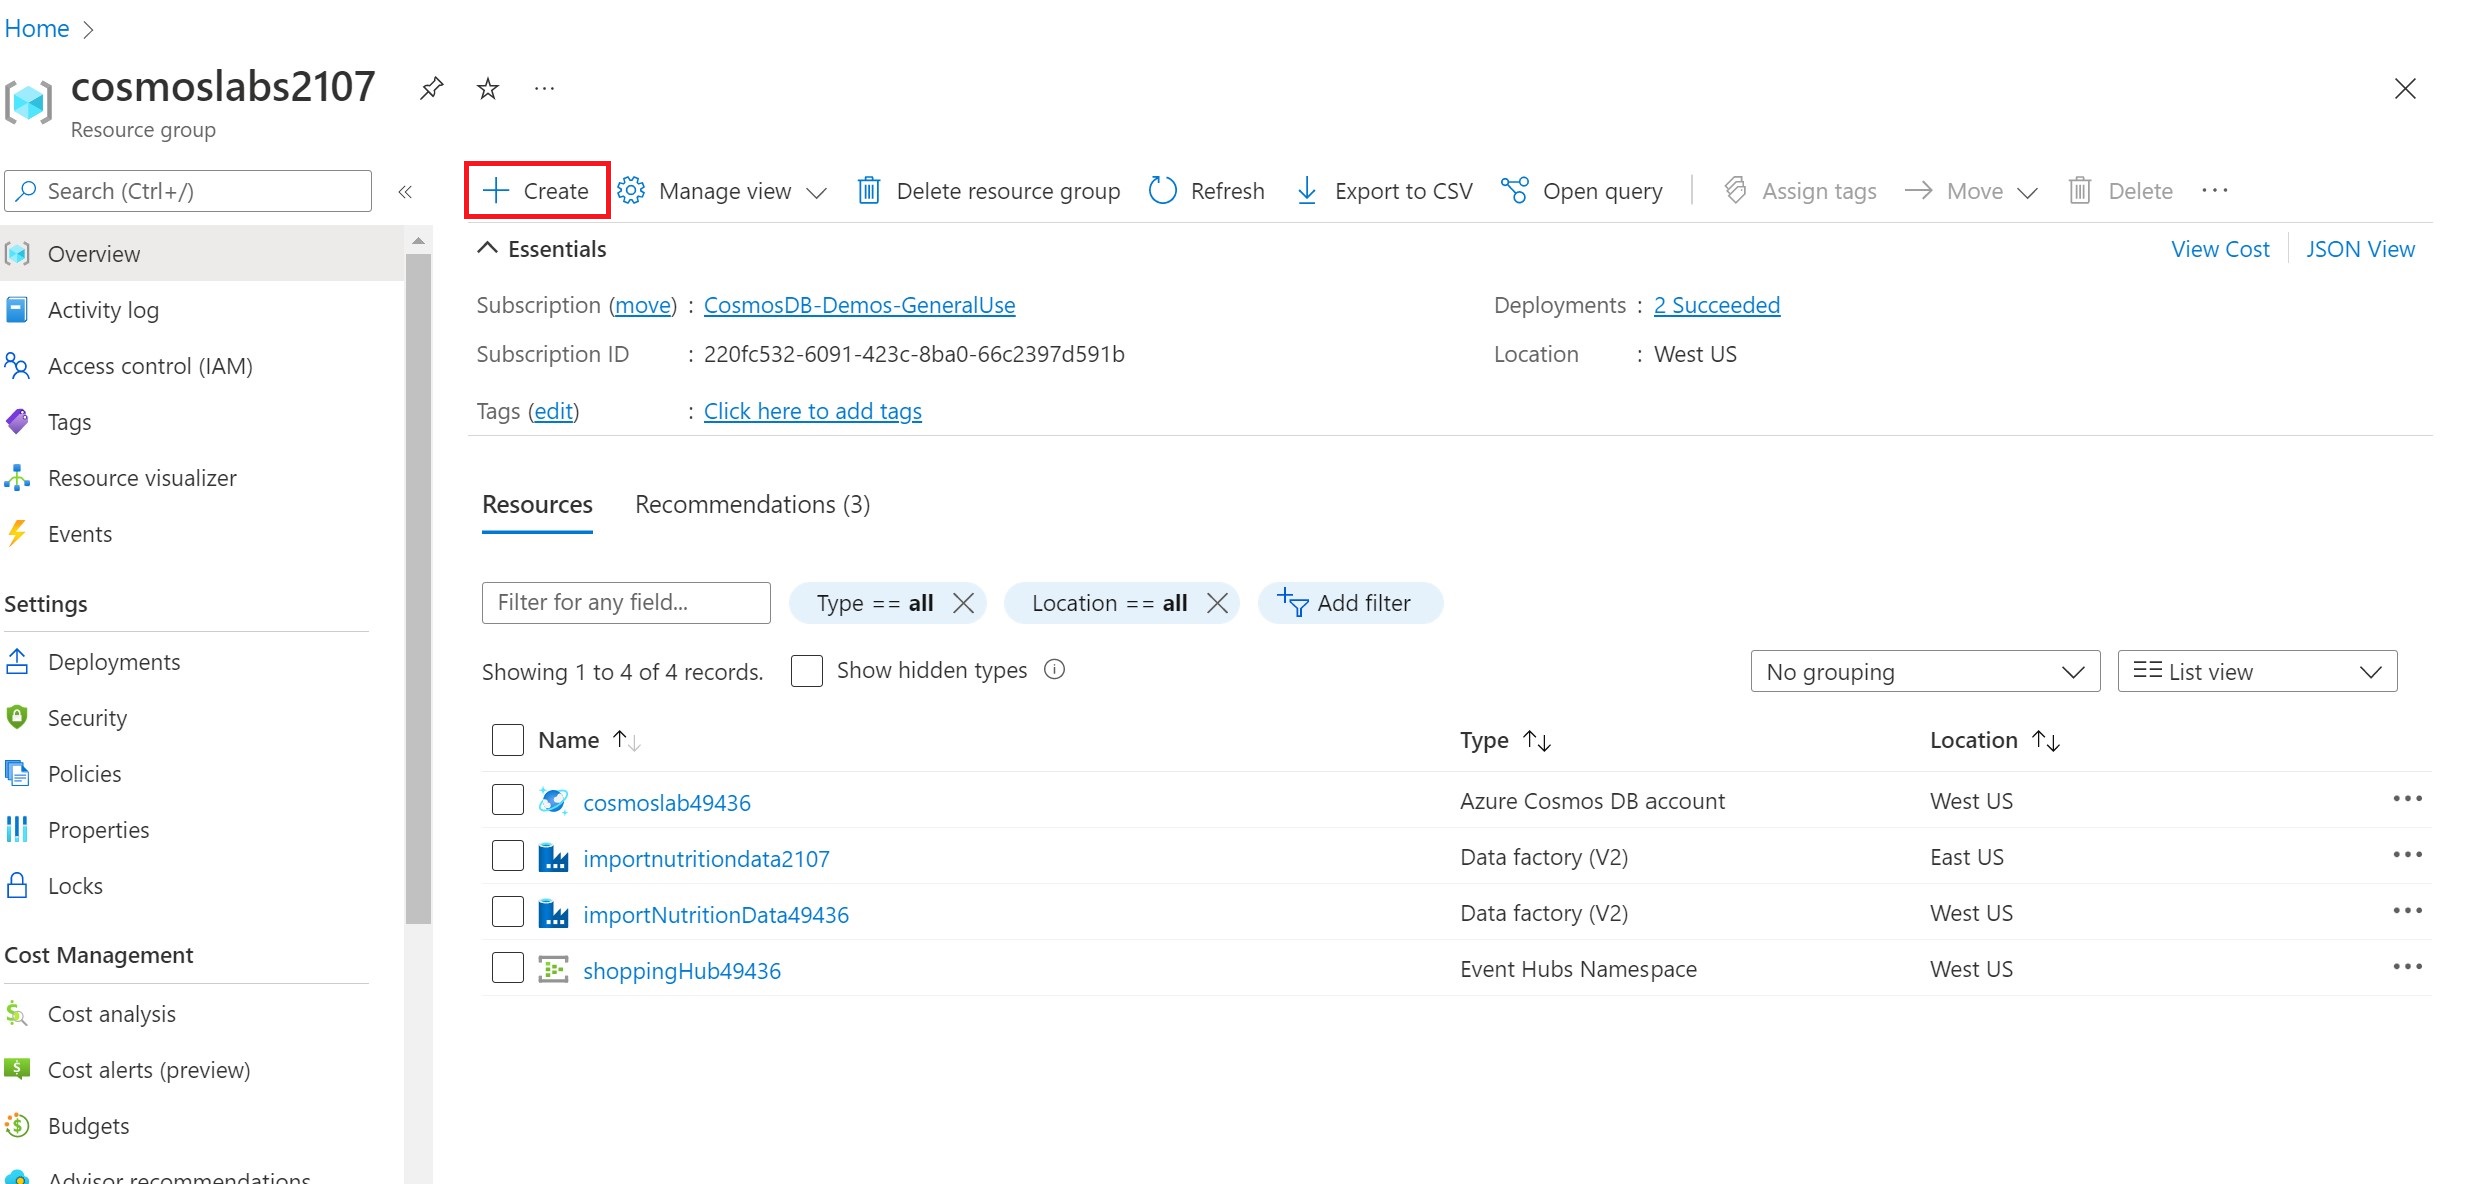
In the Resource groups blade, locate and select the cosmoslabs Resource Group.
-
Click Create to create a new resource
-
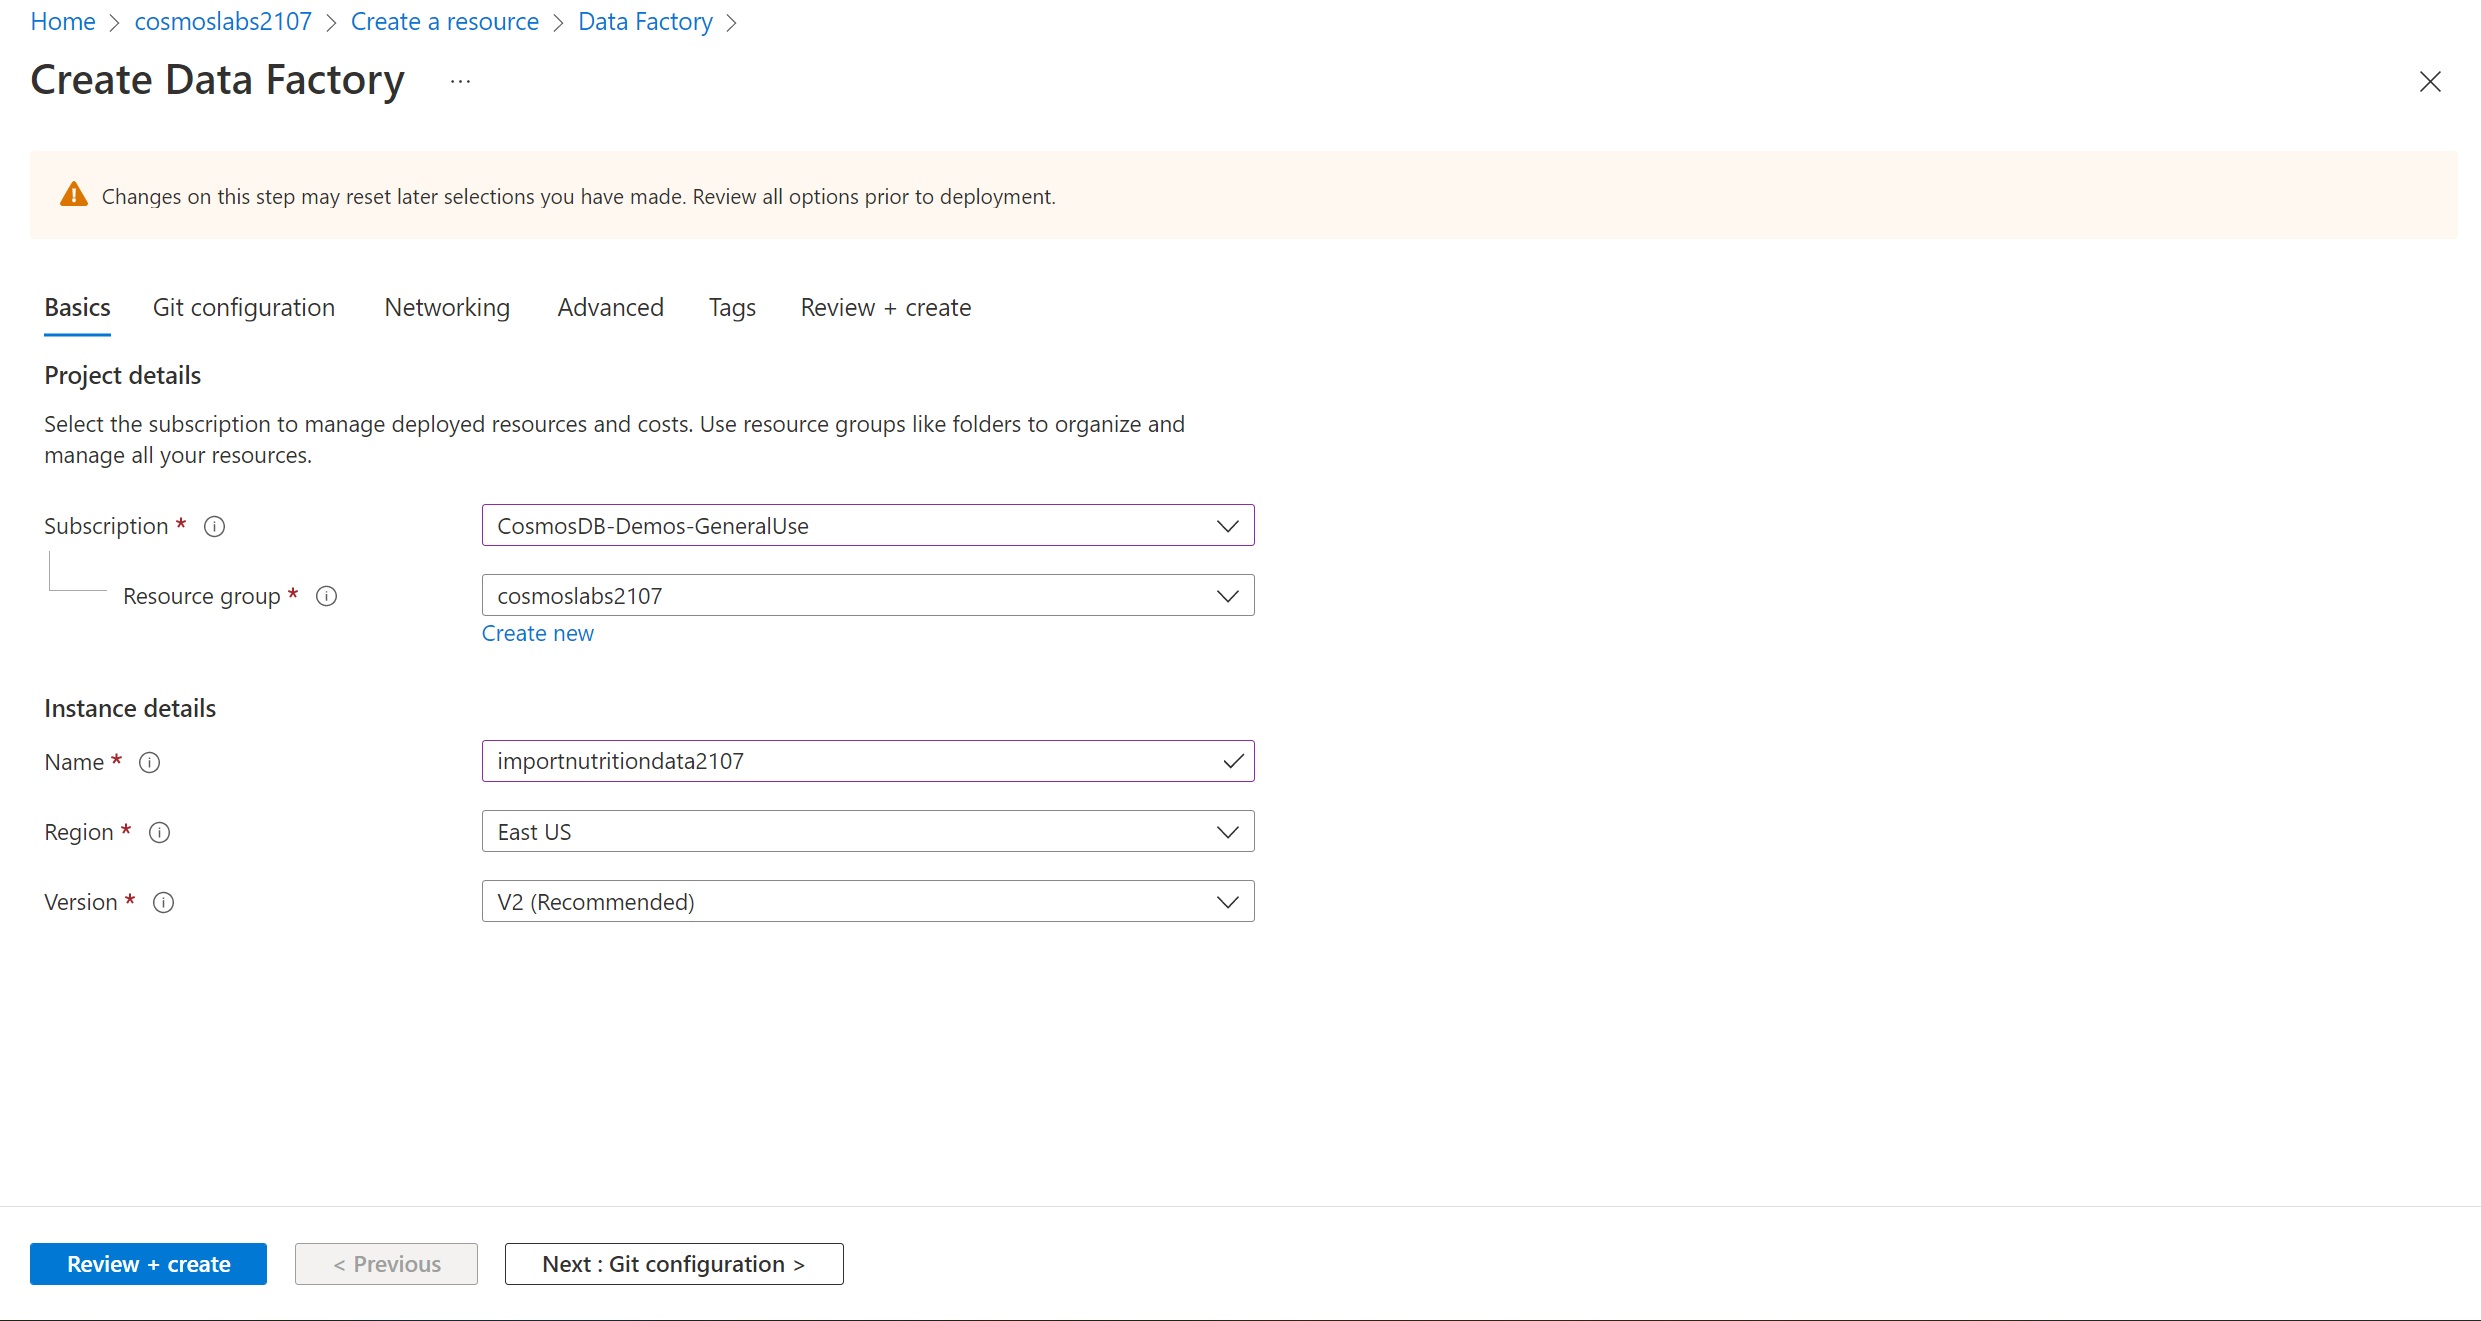
Search for Data Factory and select it. Create a new Data Factory. You should name this data factory importnutritiondata with a unique number appended and select the relevant Azure subscription. You should ensure your existing cosmoslabs resource group is selected as well as a Version V2. Select East US as the region.
-
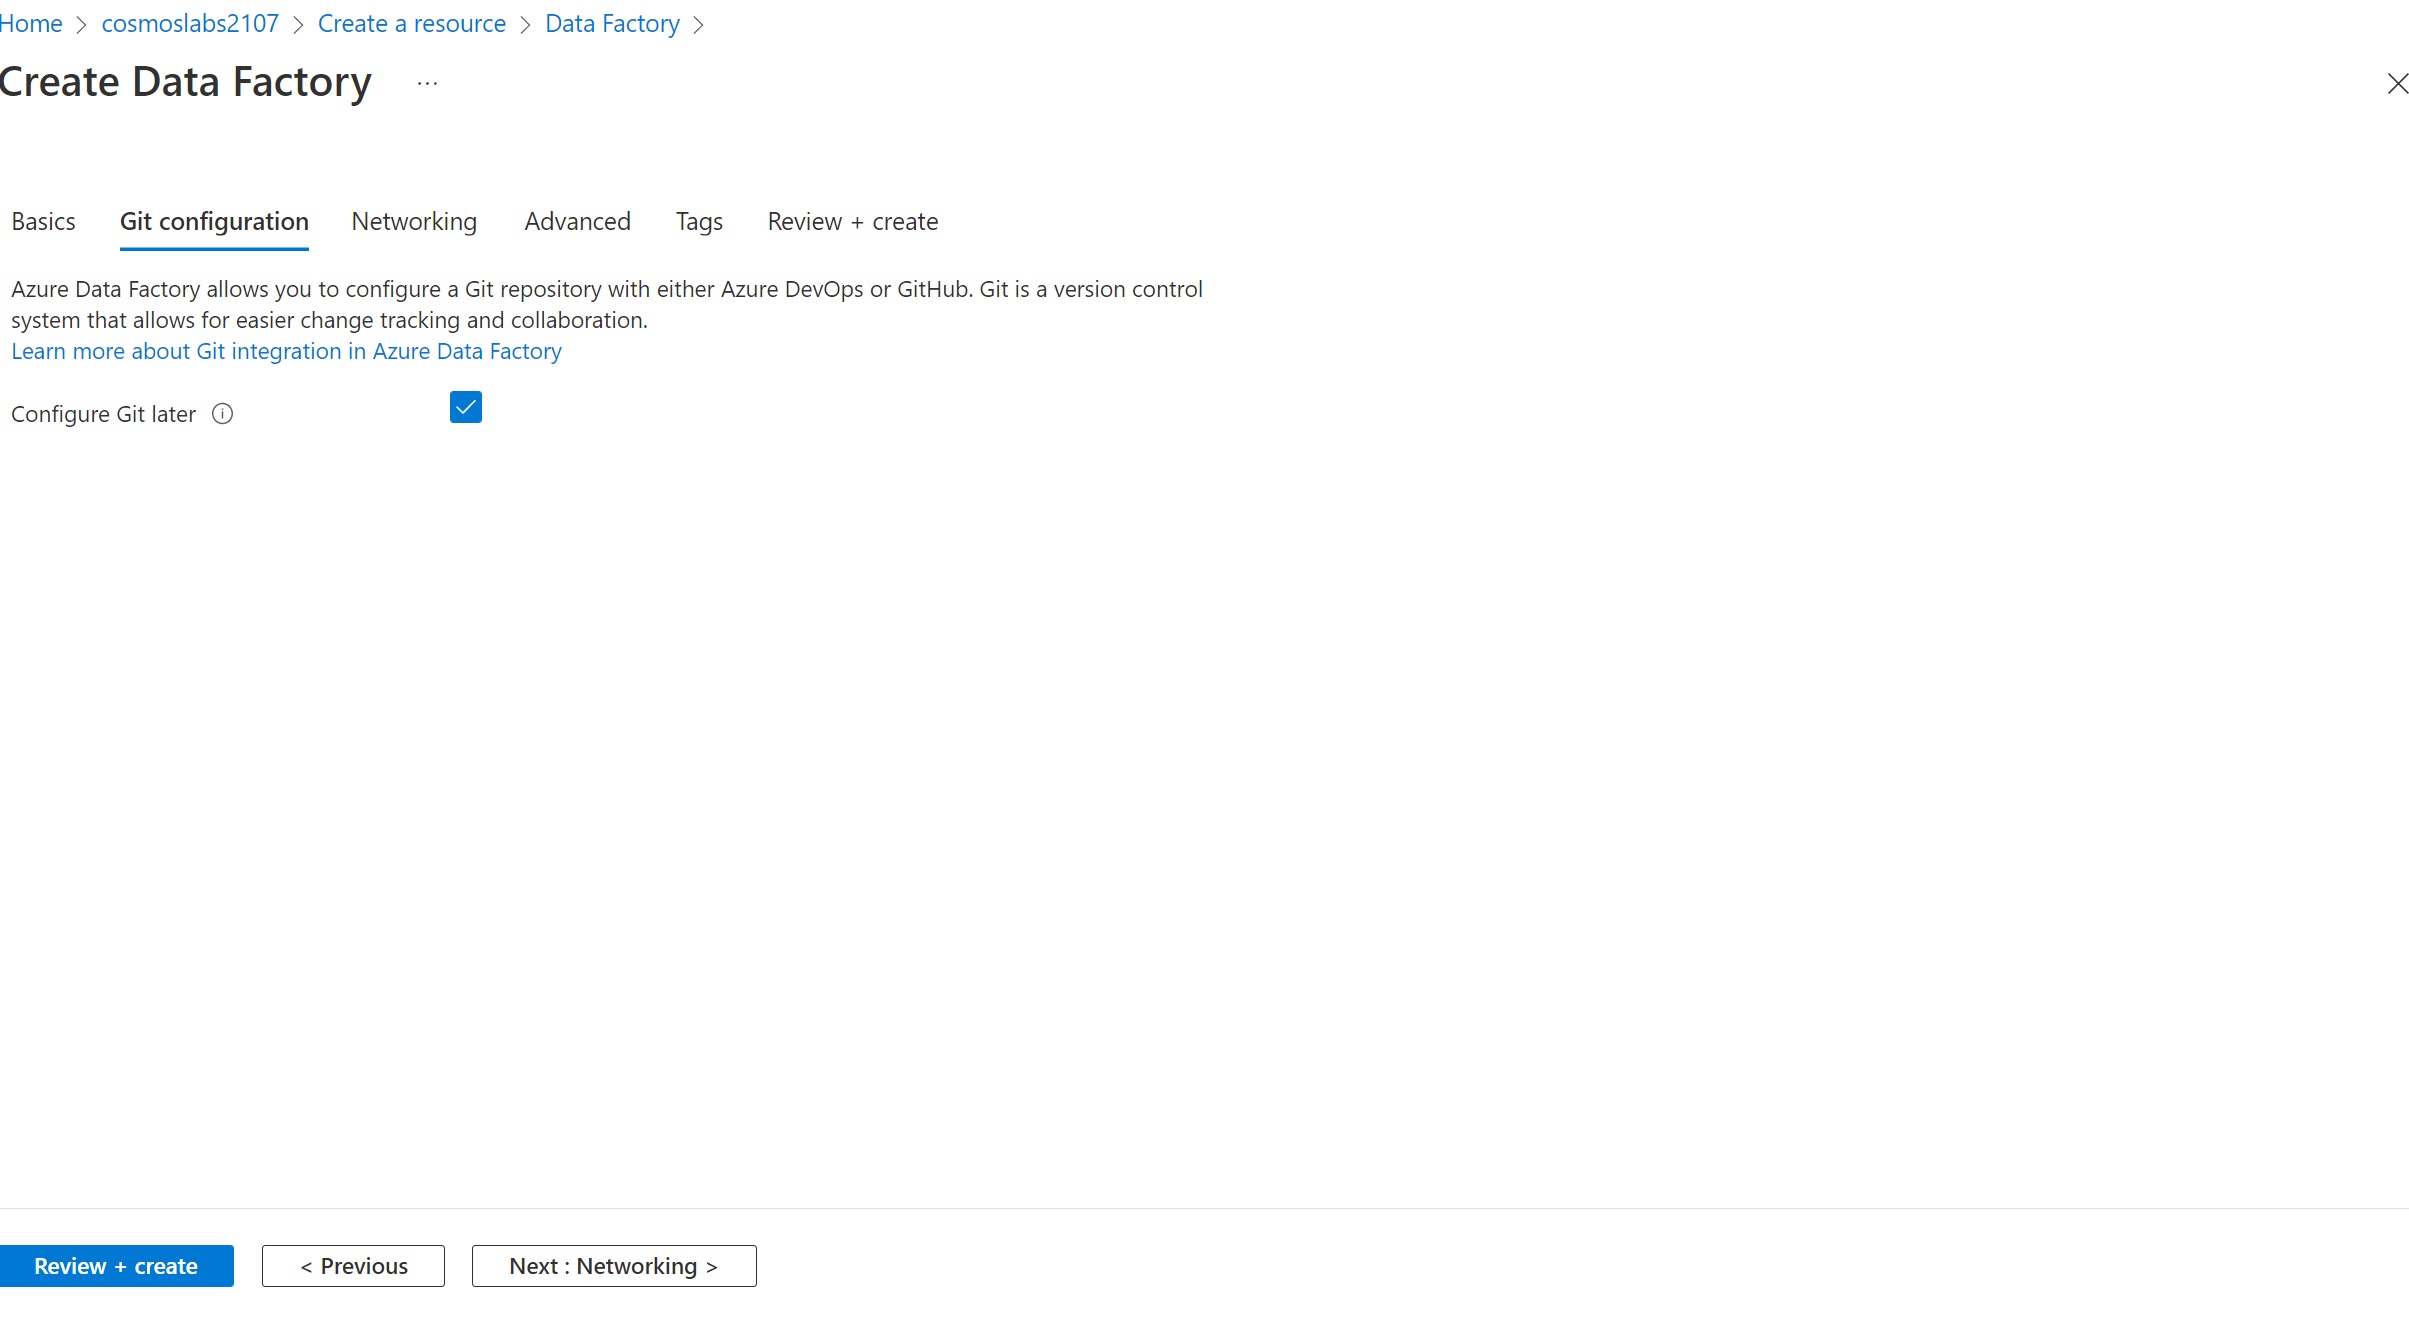
In the Git Configuration tab, check Configure Git later option (this may be unchecked by default). Click Review + Create.
-
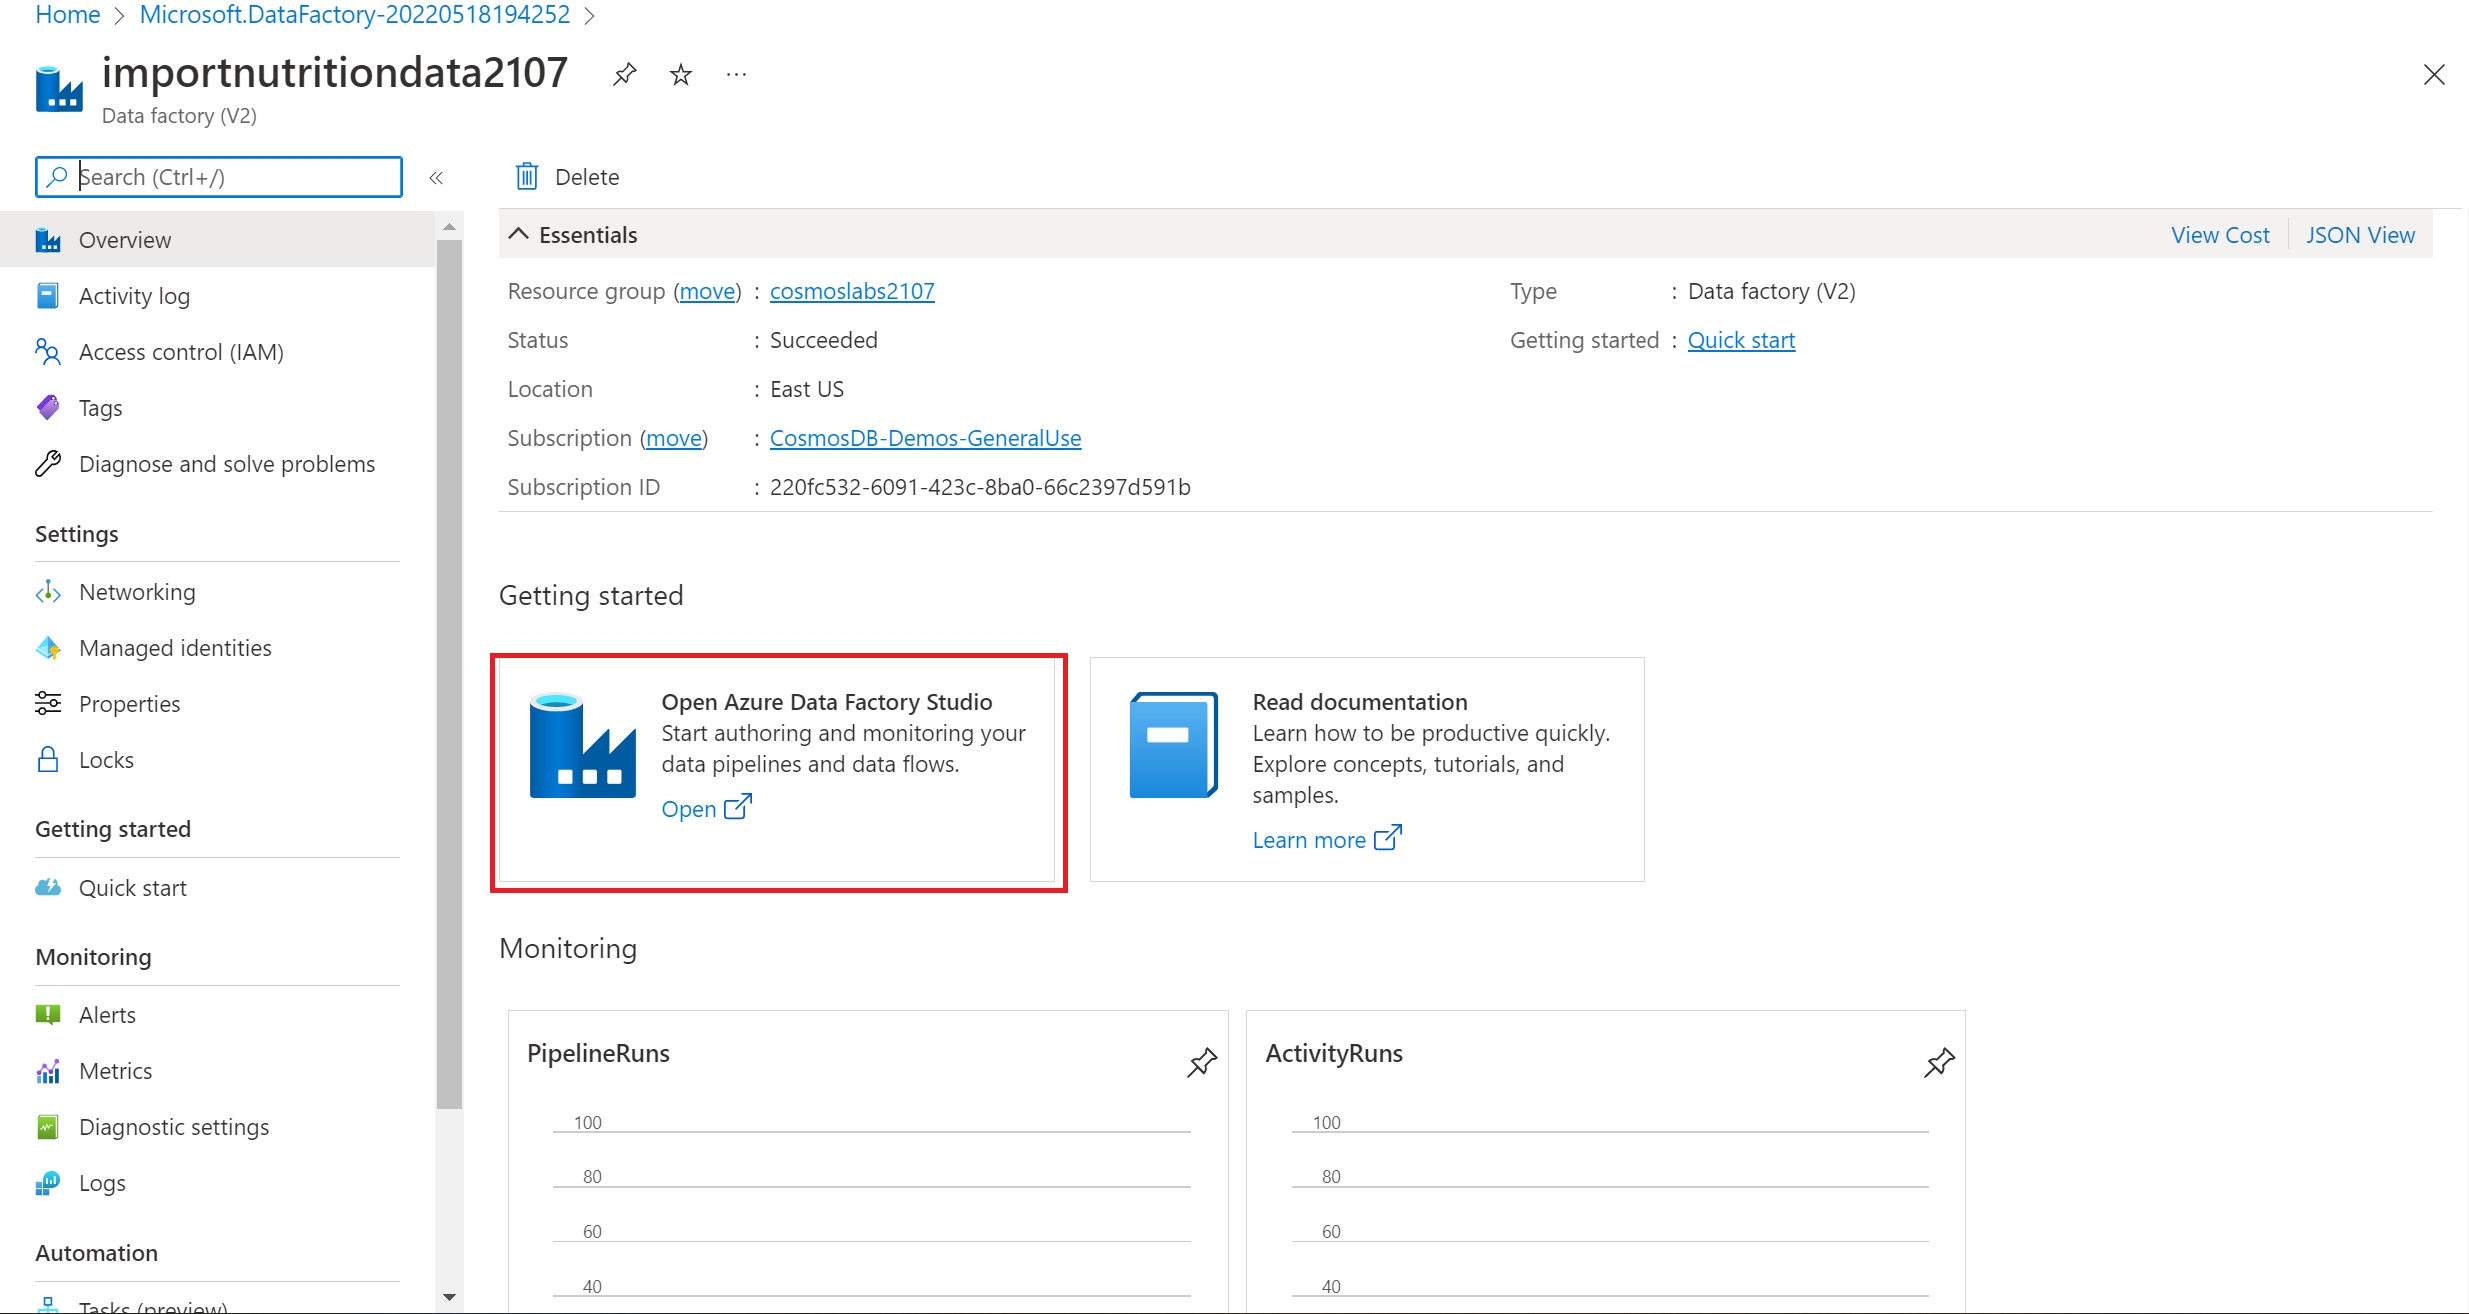
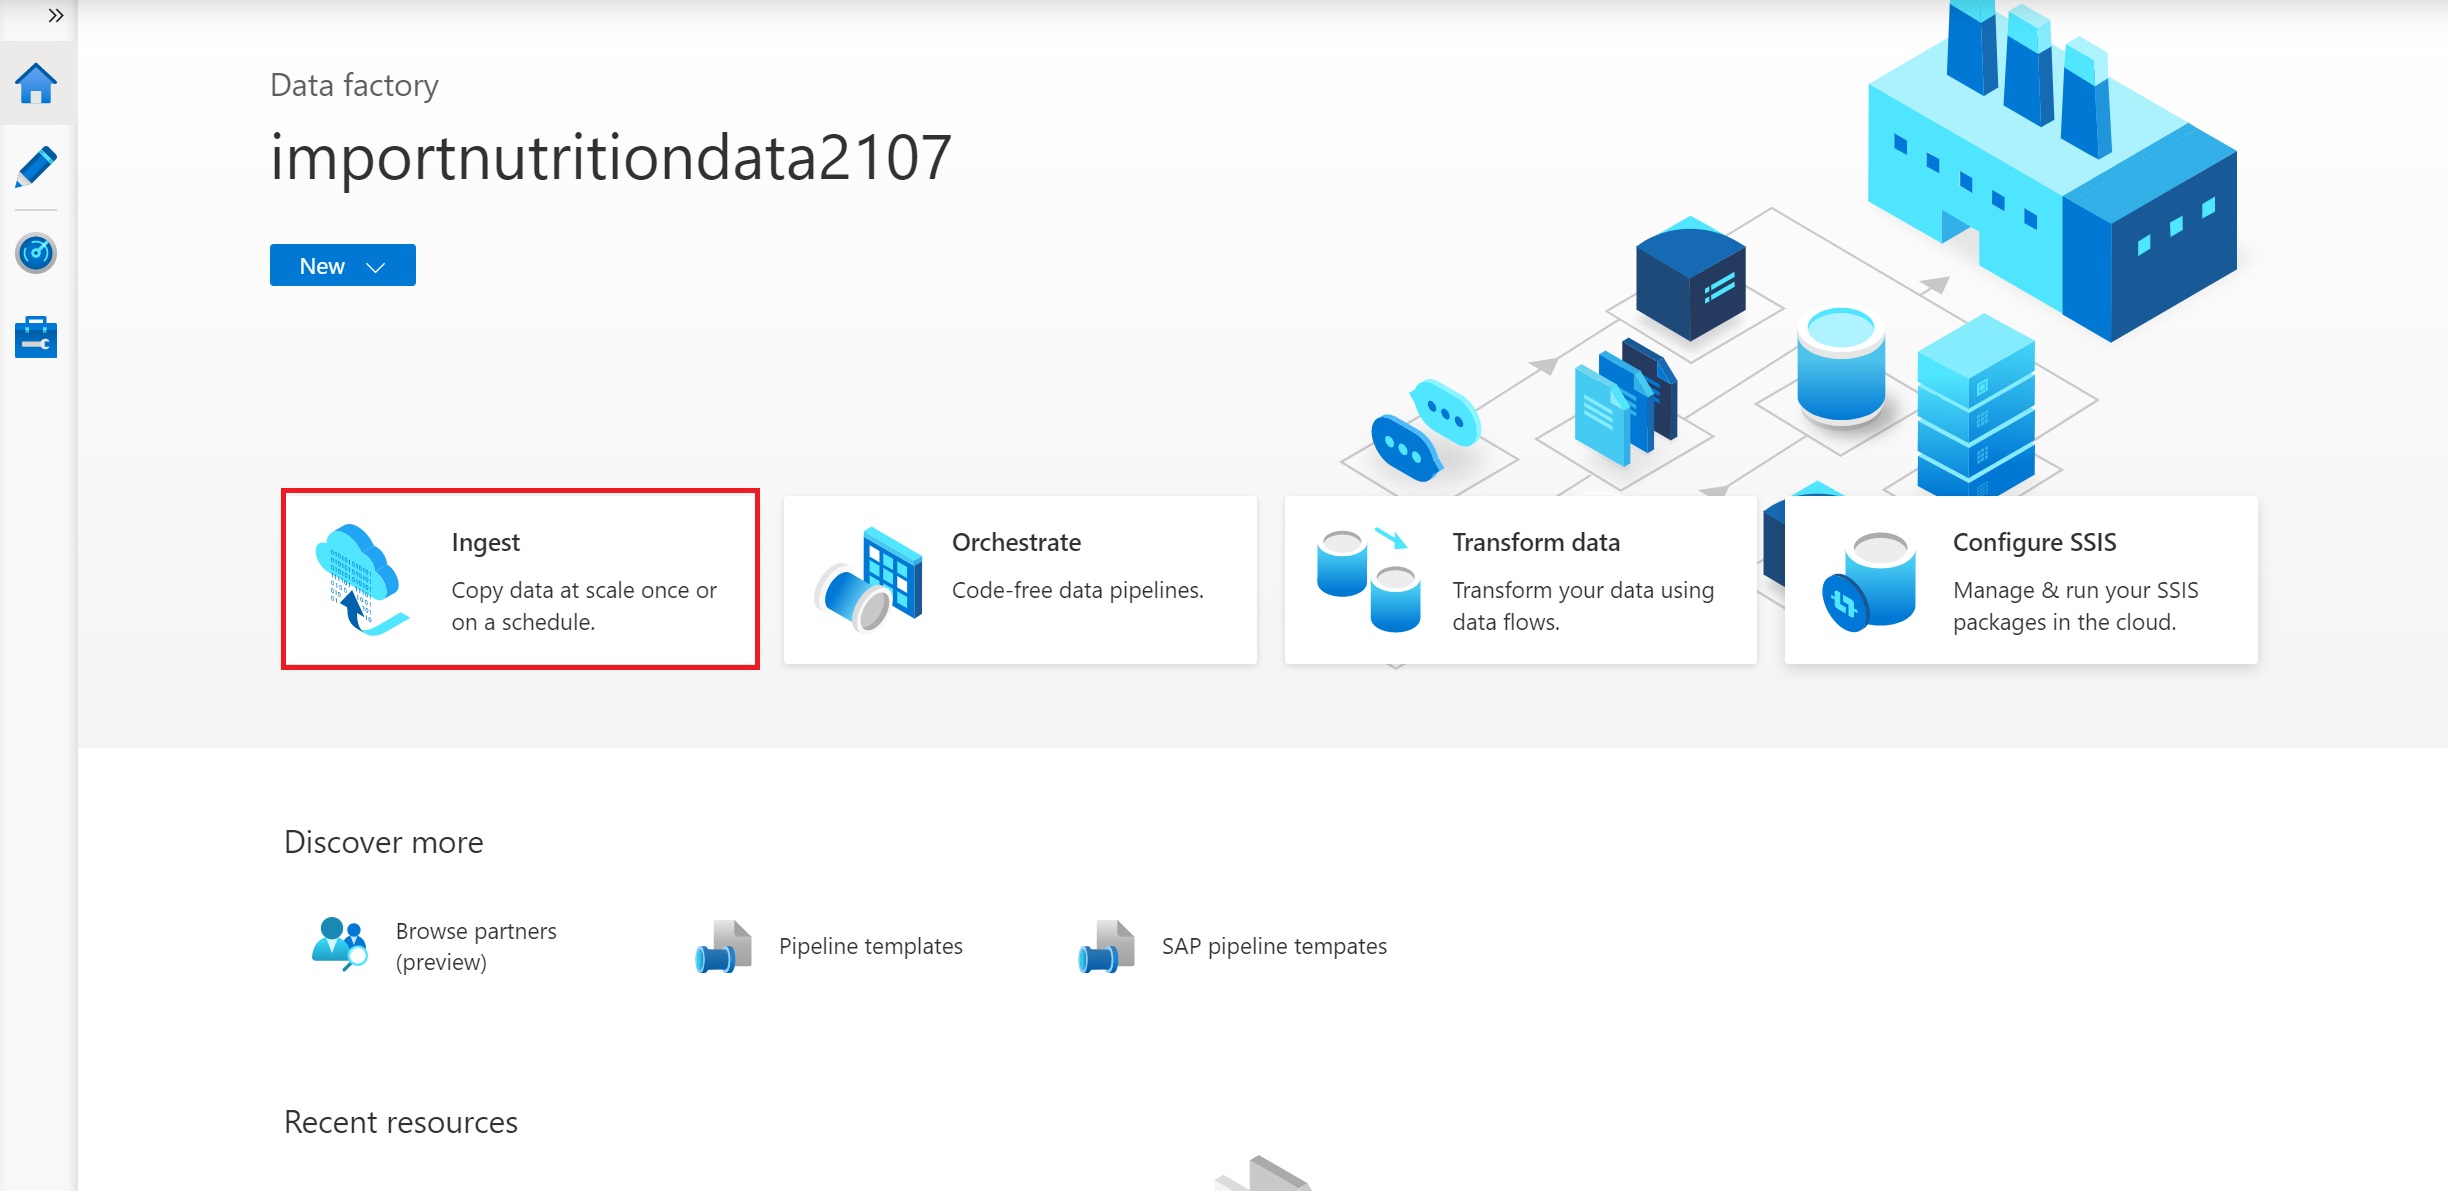
After the resource is deployed, open your newly created Data Factory. Select Open Azure Data Factory Studio and you will launch ADF. You should see a screen similar to the screenshot below. Select Ingest Data. We will be using ADF for a one-time copy of data from a source JSON file on Azure Blob Storage to a database in Cosmos DB’s SQL API. ADF can also be used for more frequent data transfers from Cosmos DB to other data stores.
-
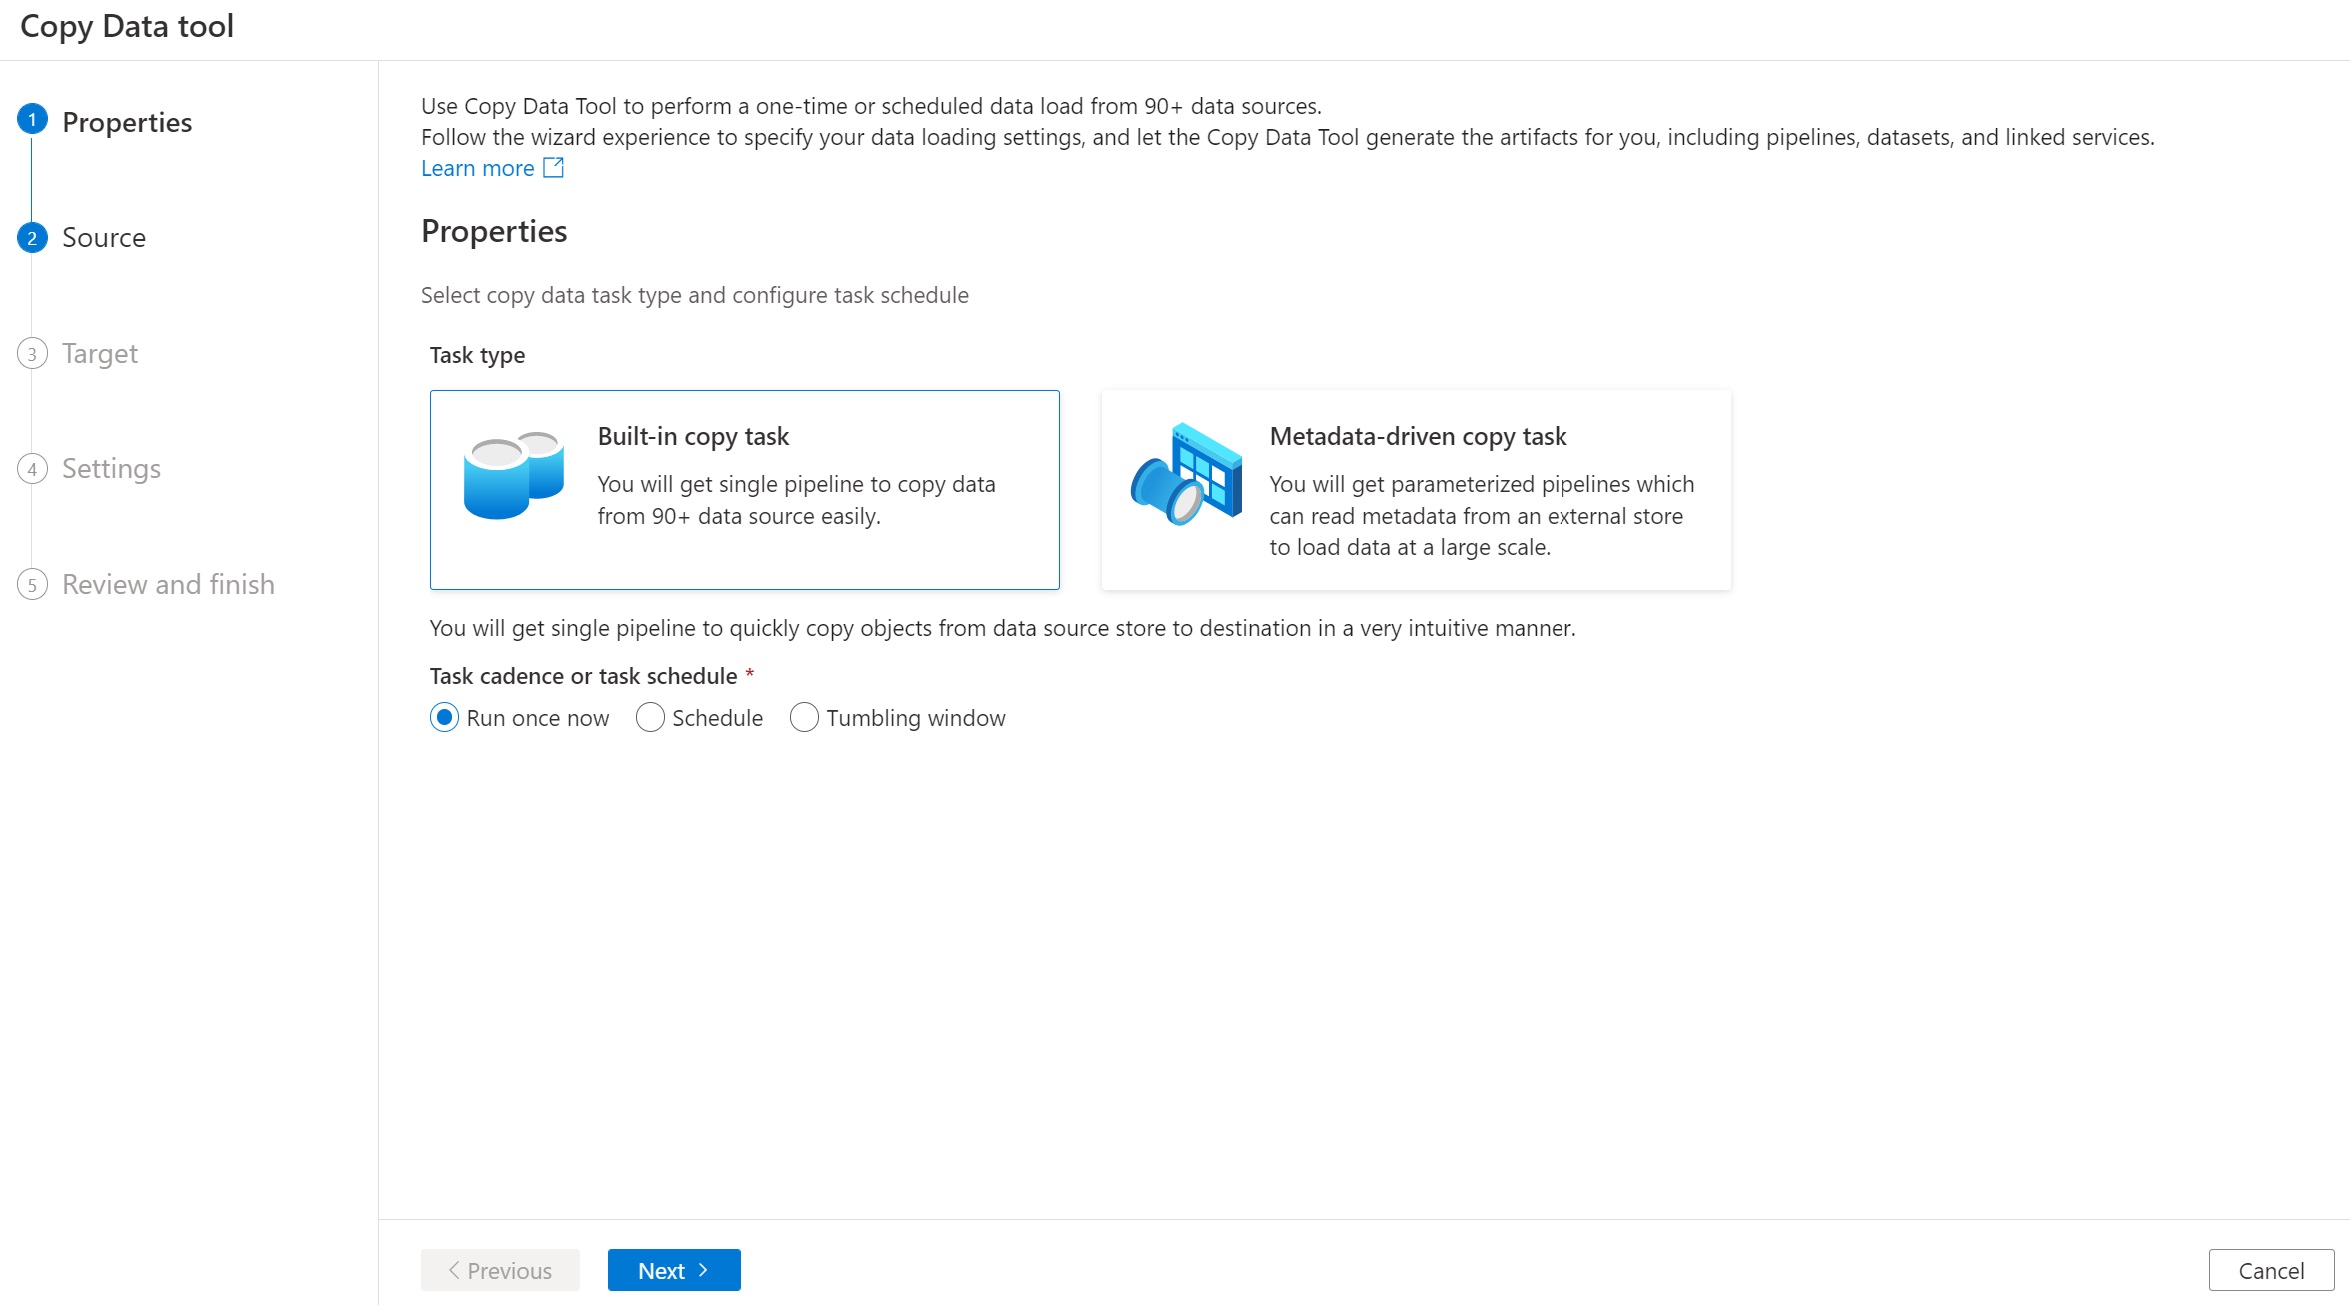
Edit basic properties for this data copy. Select Built-in copy task option and choose Run once now.
-
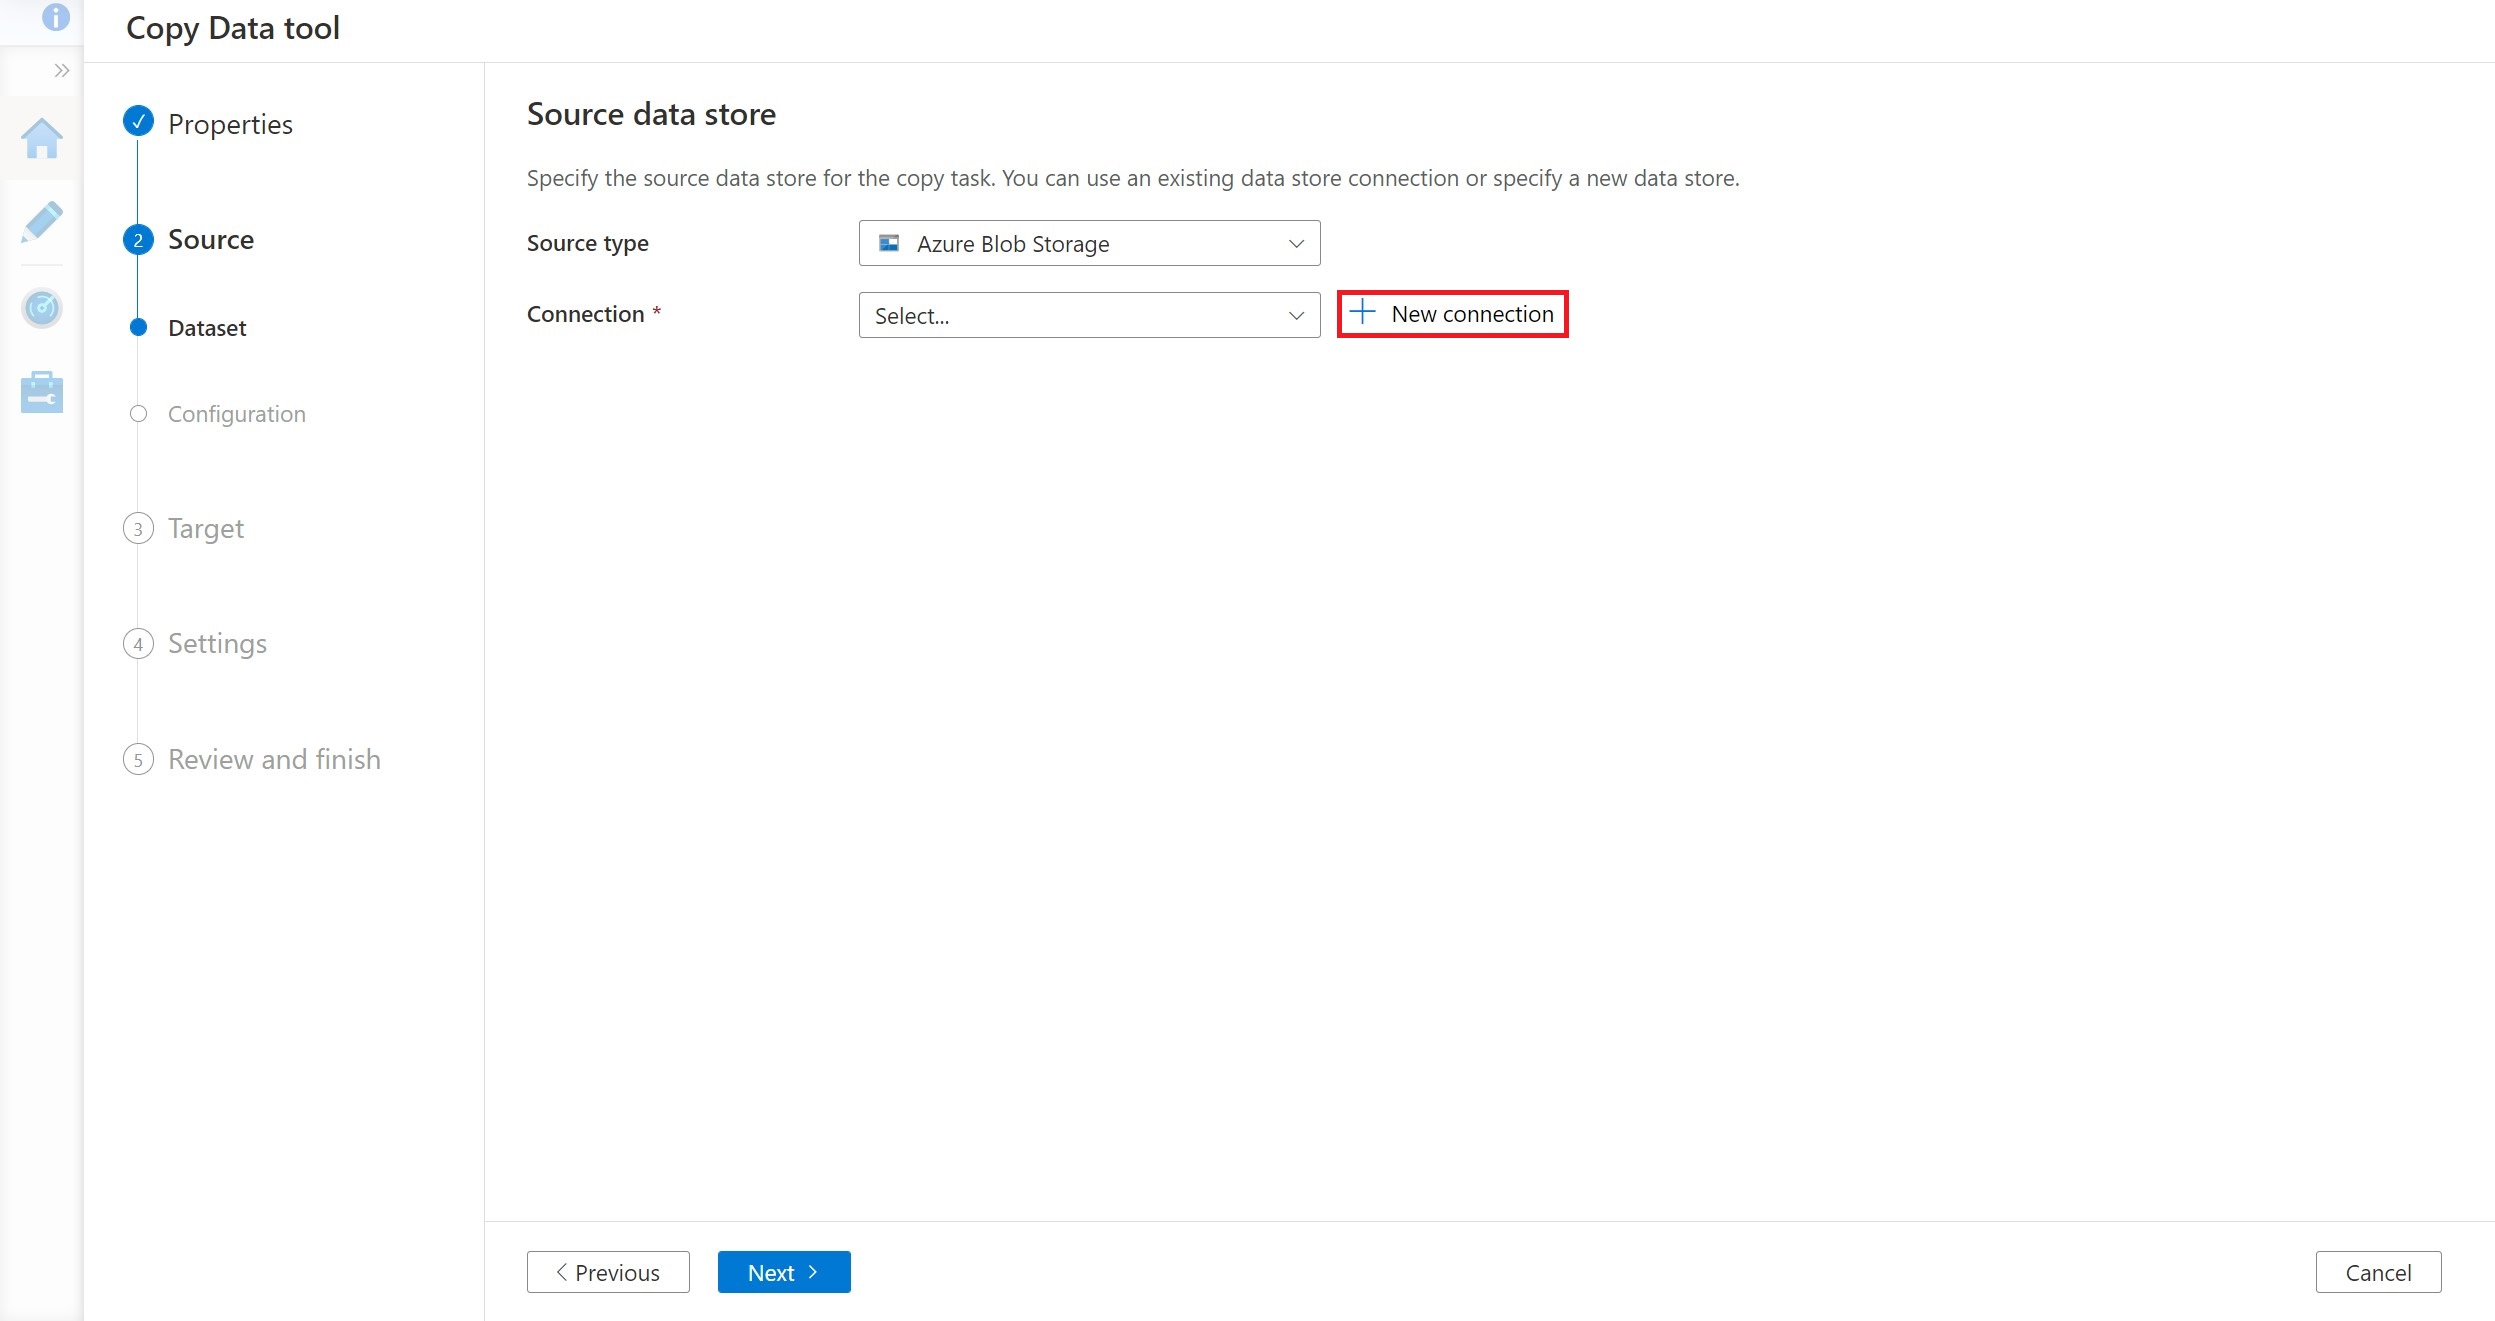
Select Azure Blob Storage in the Source type field and click on New connection. We will import data from a json file on Azure Blob Storage. In addition to Blob Storage, you can use ADF to migrate from a wide variety of sources. We will not cover migration from these sources in this tutorial.

To learn more about different data sources supported by Azure Data Factory please go through this doc
-
Name the source NutritionJson and select SAS URI as the Authentication method. Please use the following SAS URI for read-only access to this Blob Storage container:
https://cosmoslabsstorageaccount.blob.core.windows.net/nutrition-data?si=container-list-read-policy&spr=https&sv=2021-06-08&sr=c&sig=jGrmrokYikbgbuW9we2am%2BwAq%2BC%2BxfZcPYswOeSQpAU%3D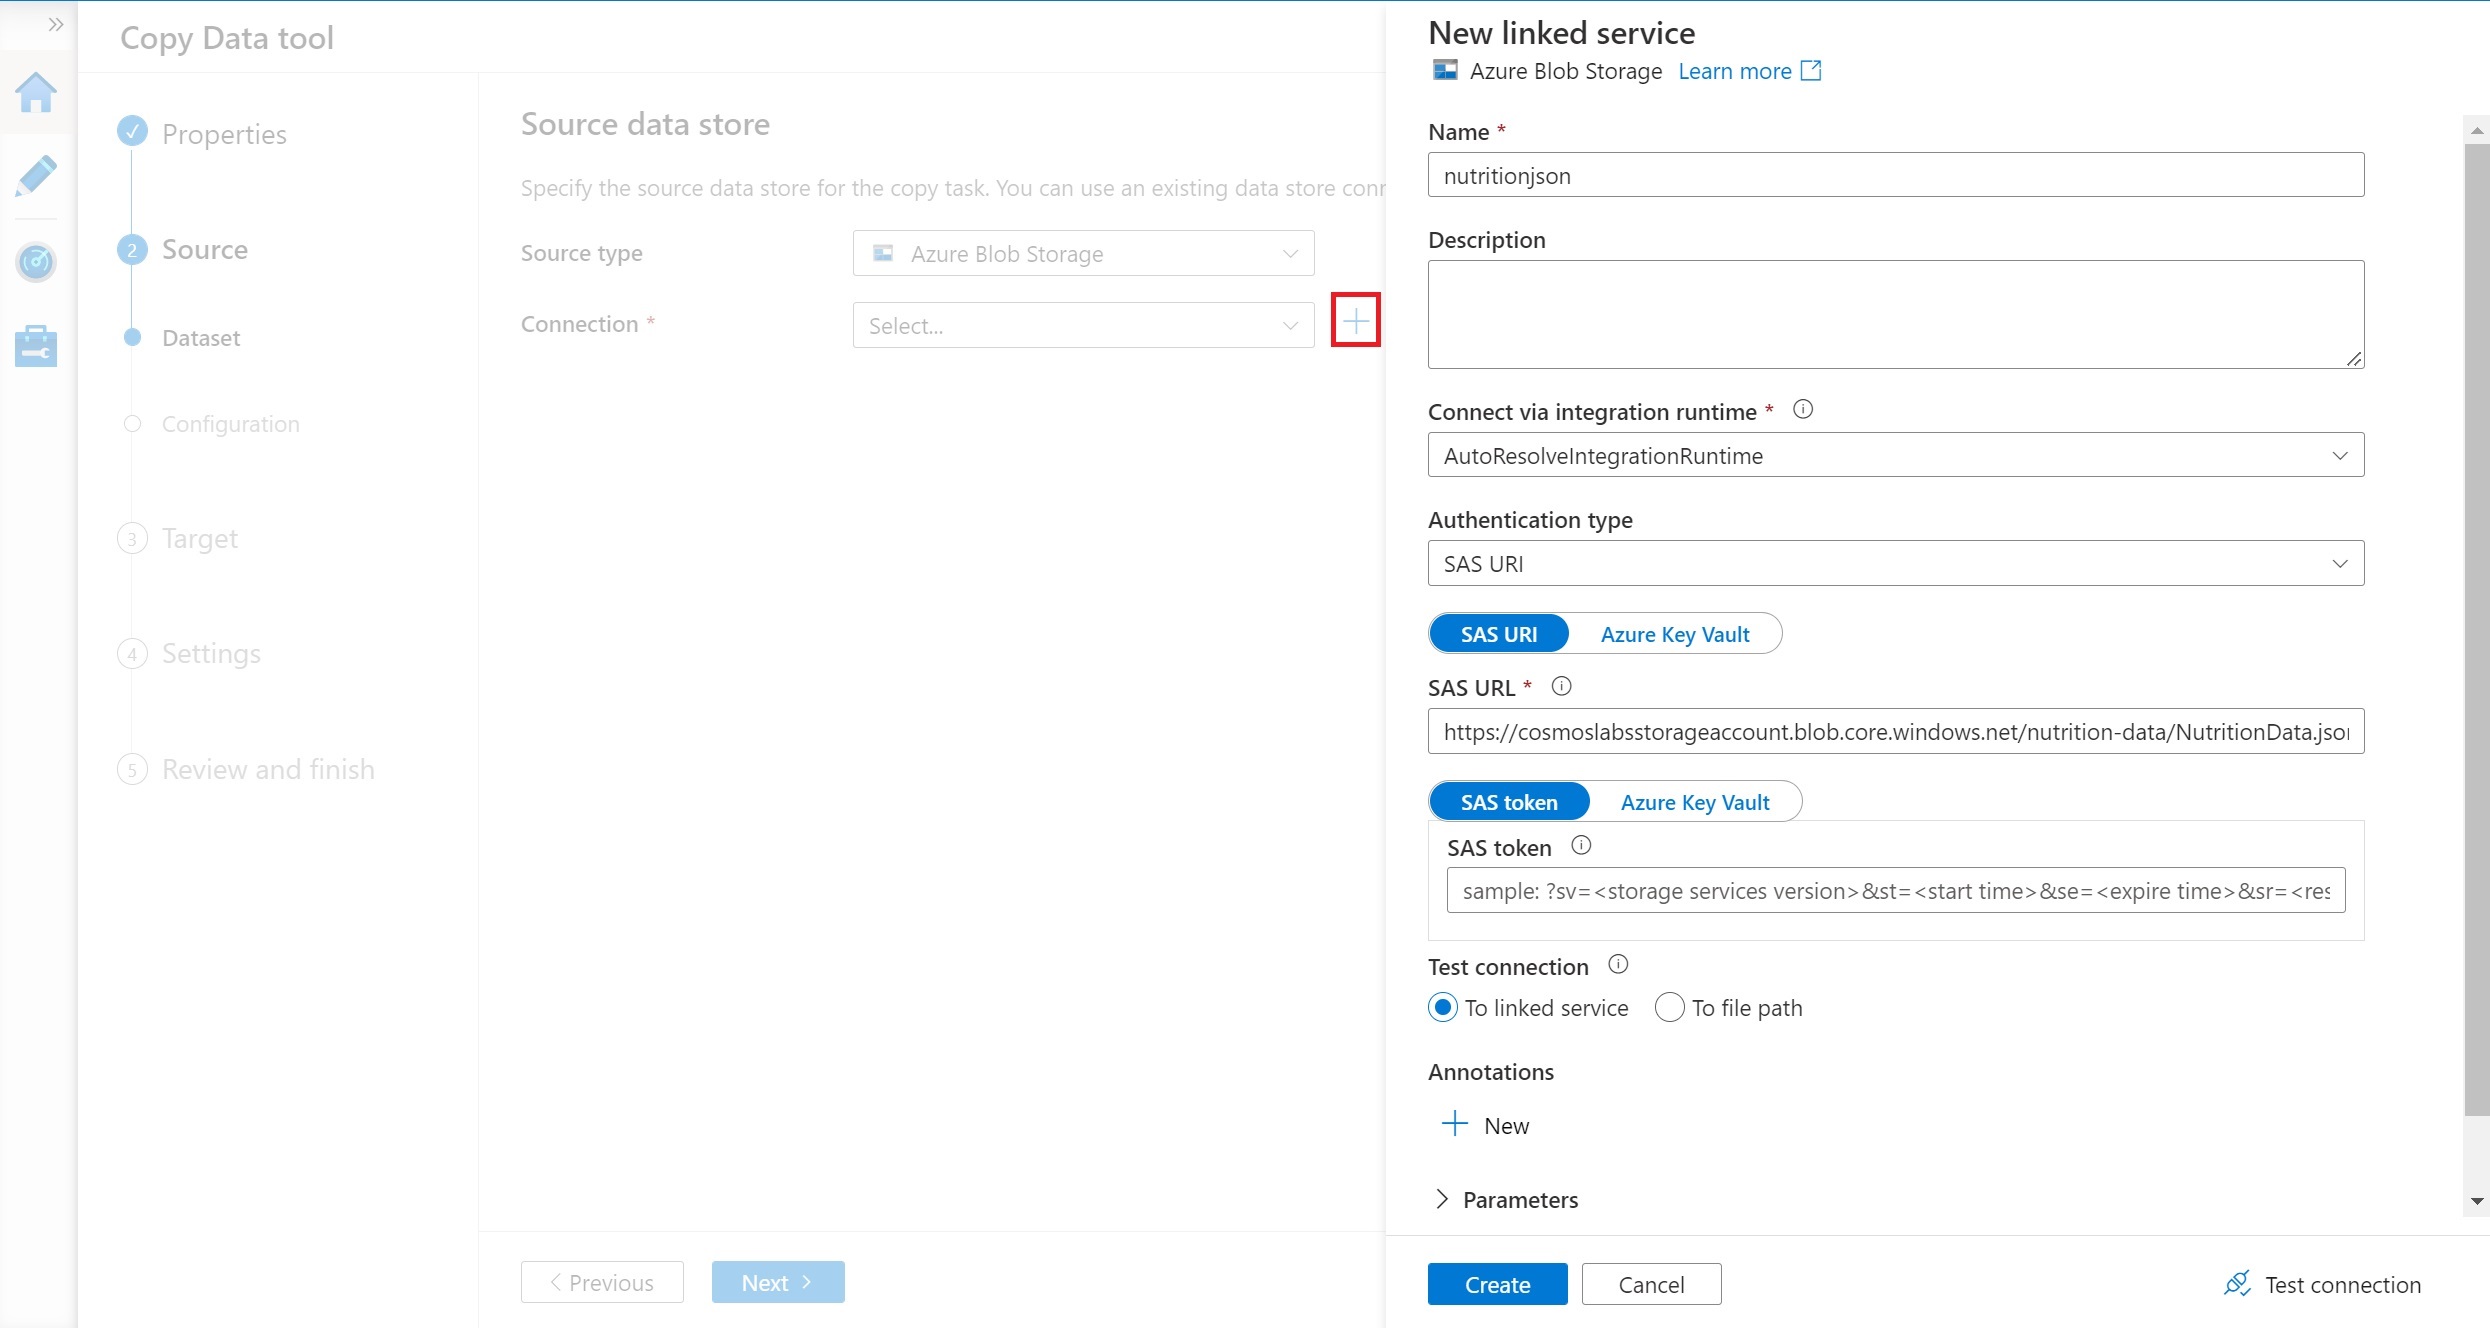
-
Click on Create to create the connection.
-
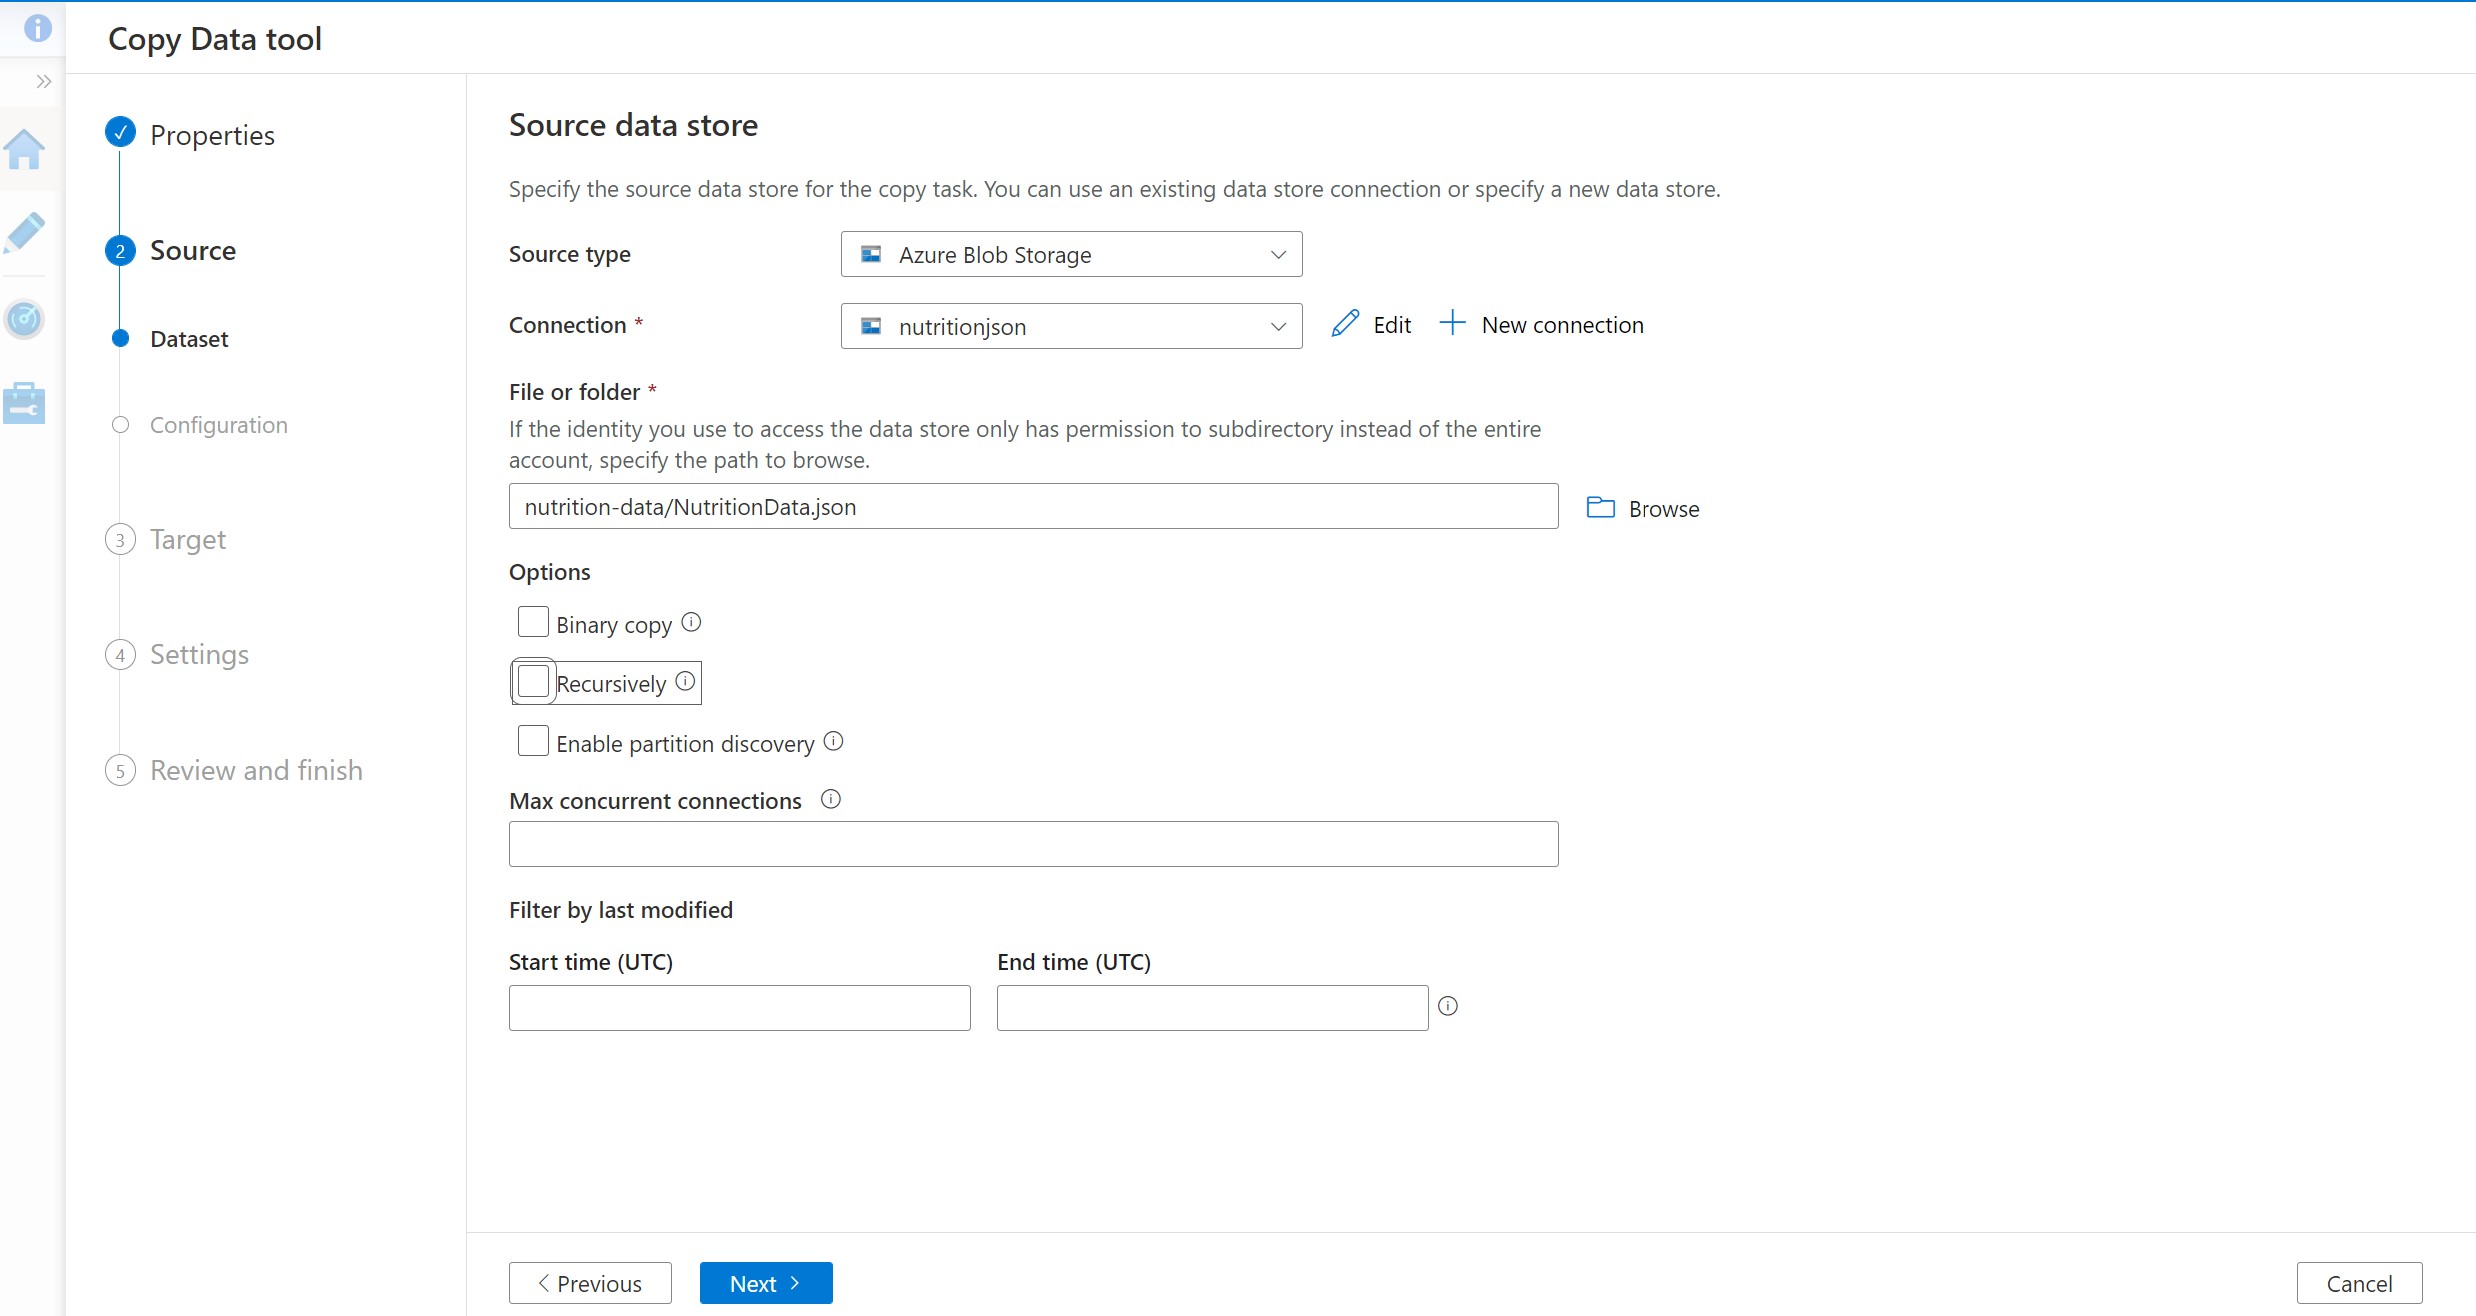
In the File or Folder textbox, enter the folder name as
nutirion-dataand then click on Browse to select the nutrition-data folder. Finally select NutritionData.json file.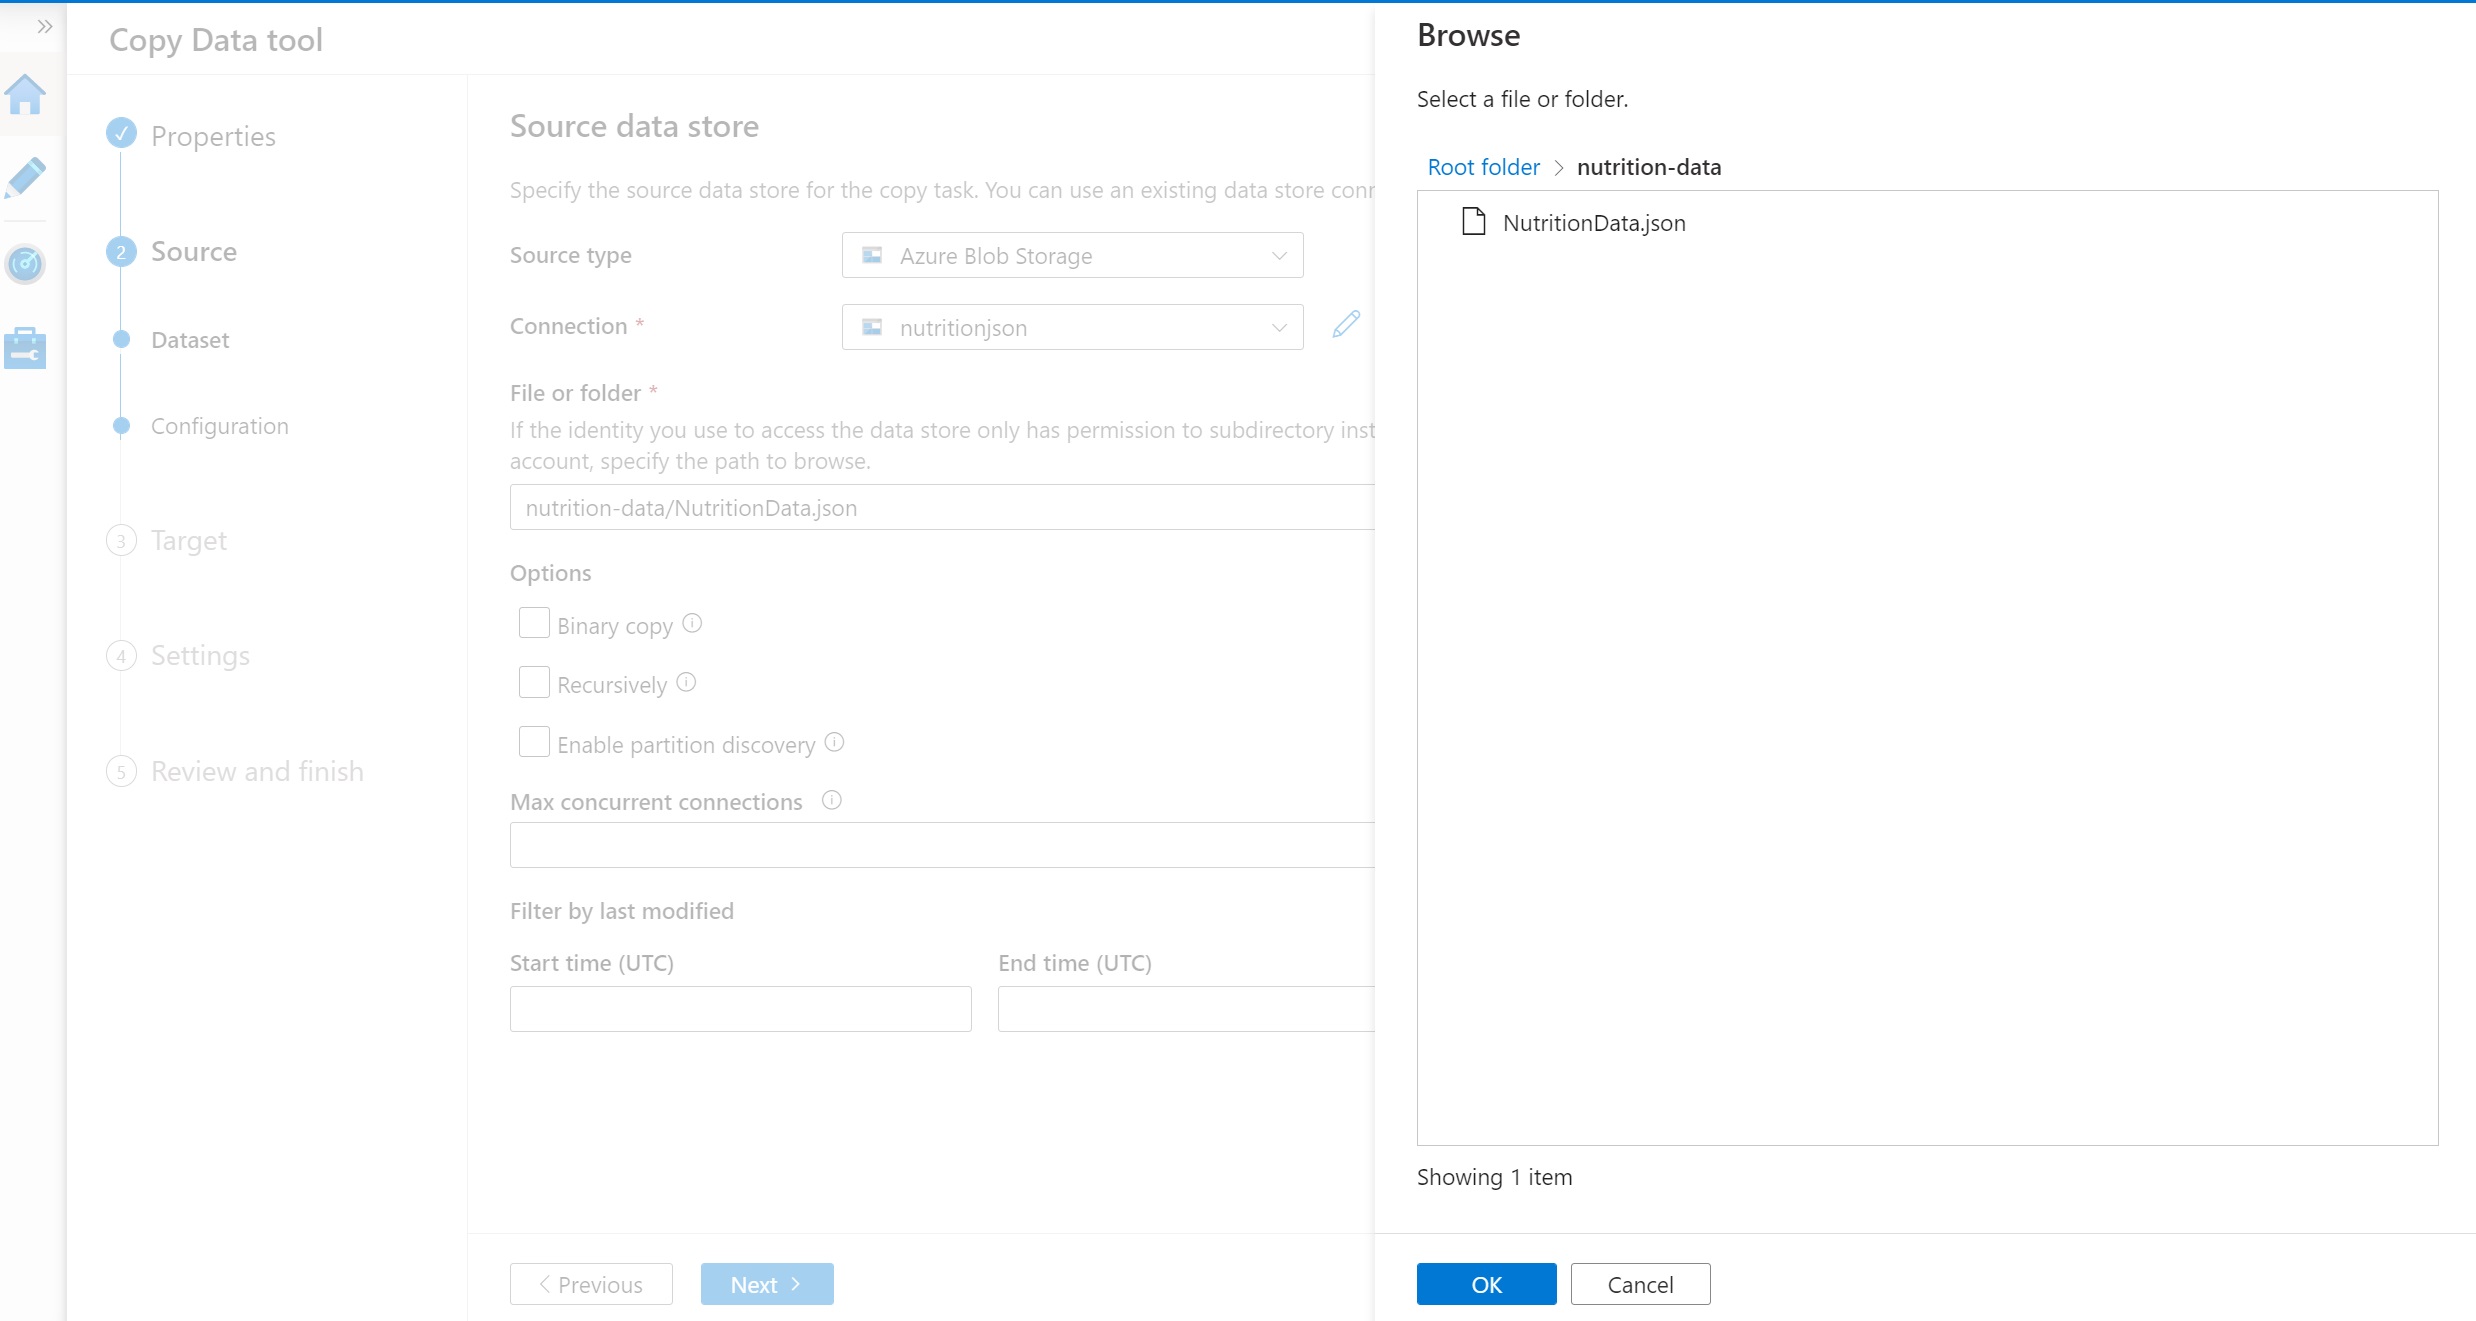
-
Do not check Copy file recursively or Binary Copy. Also ensure that other fields are empty.
-
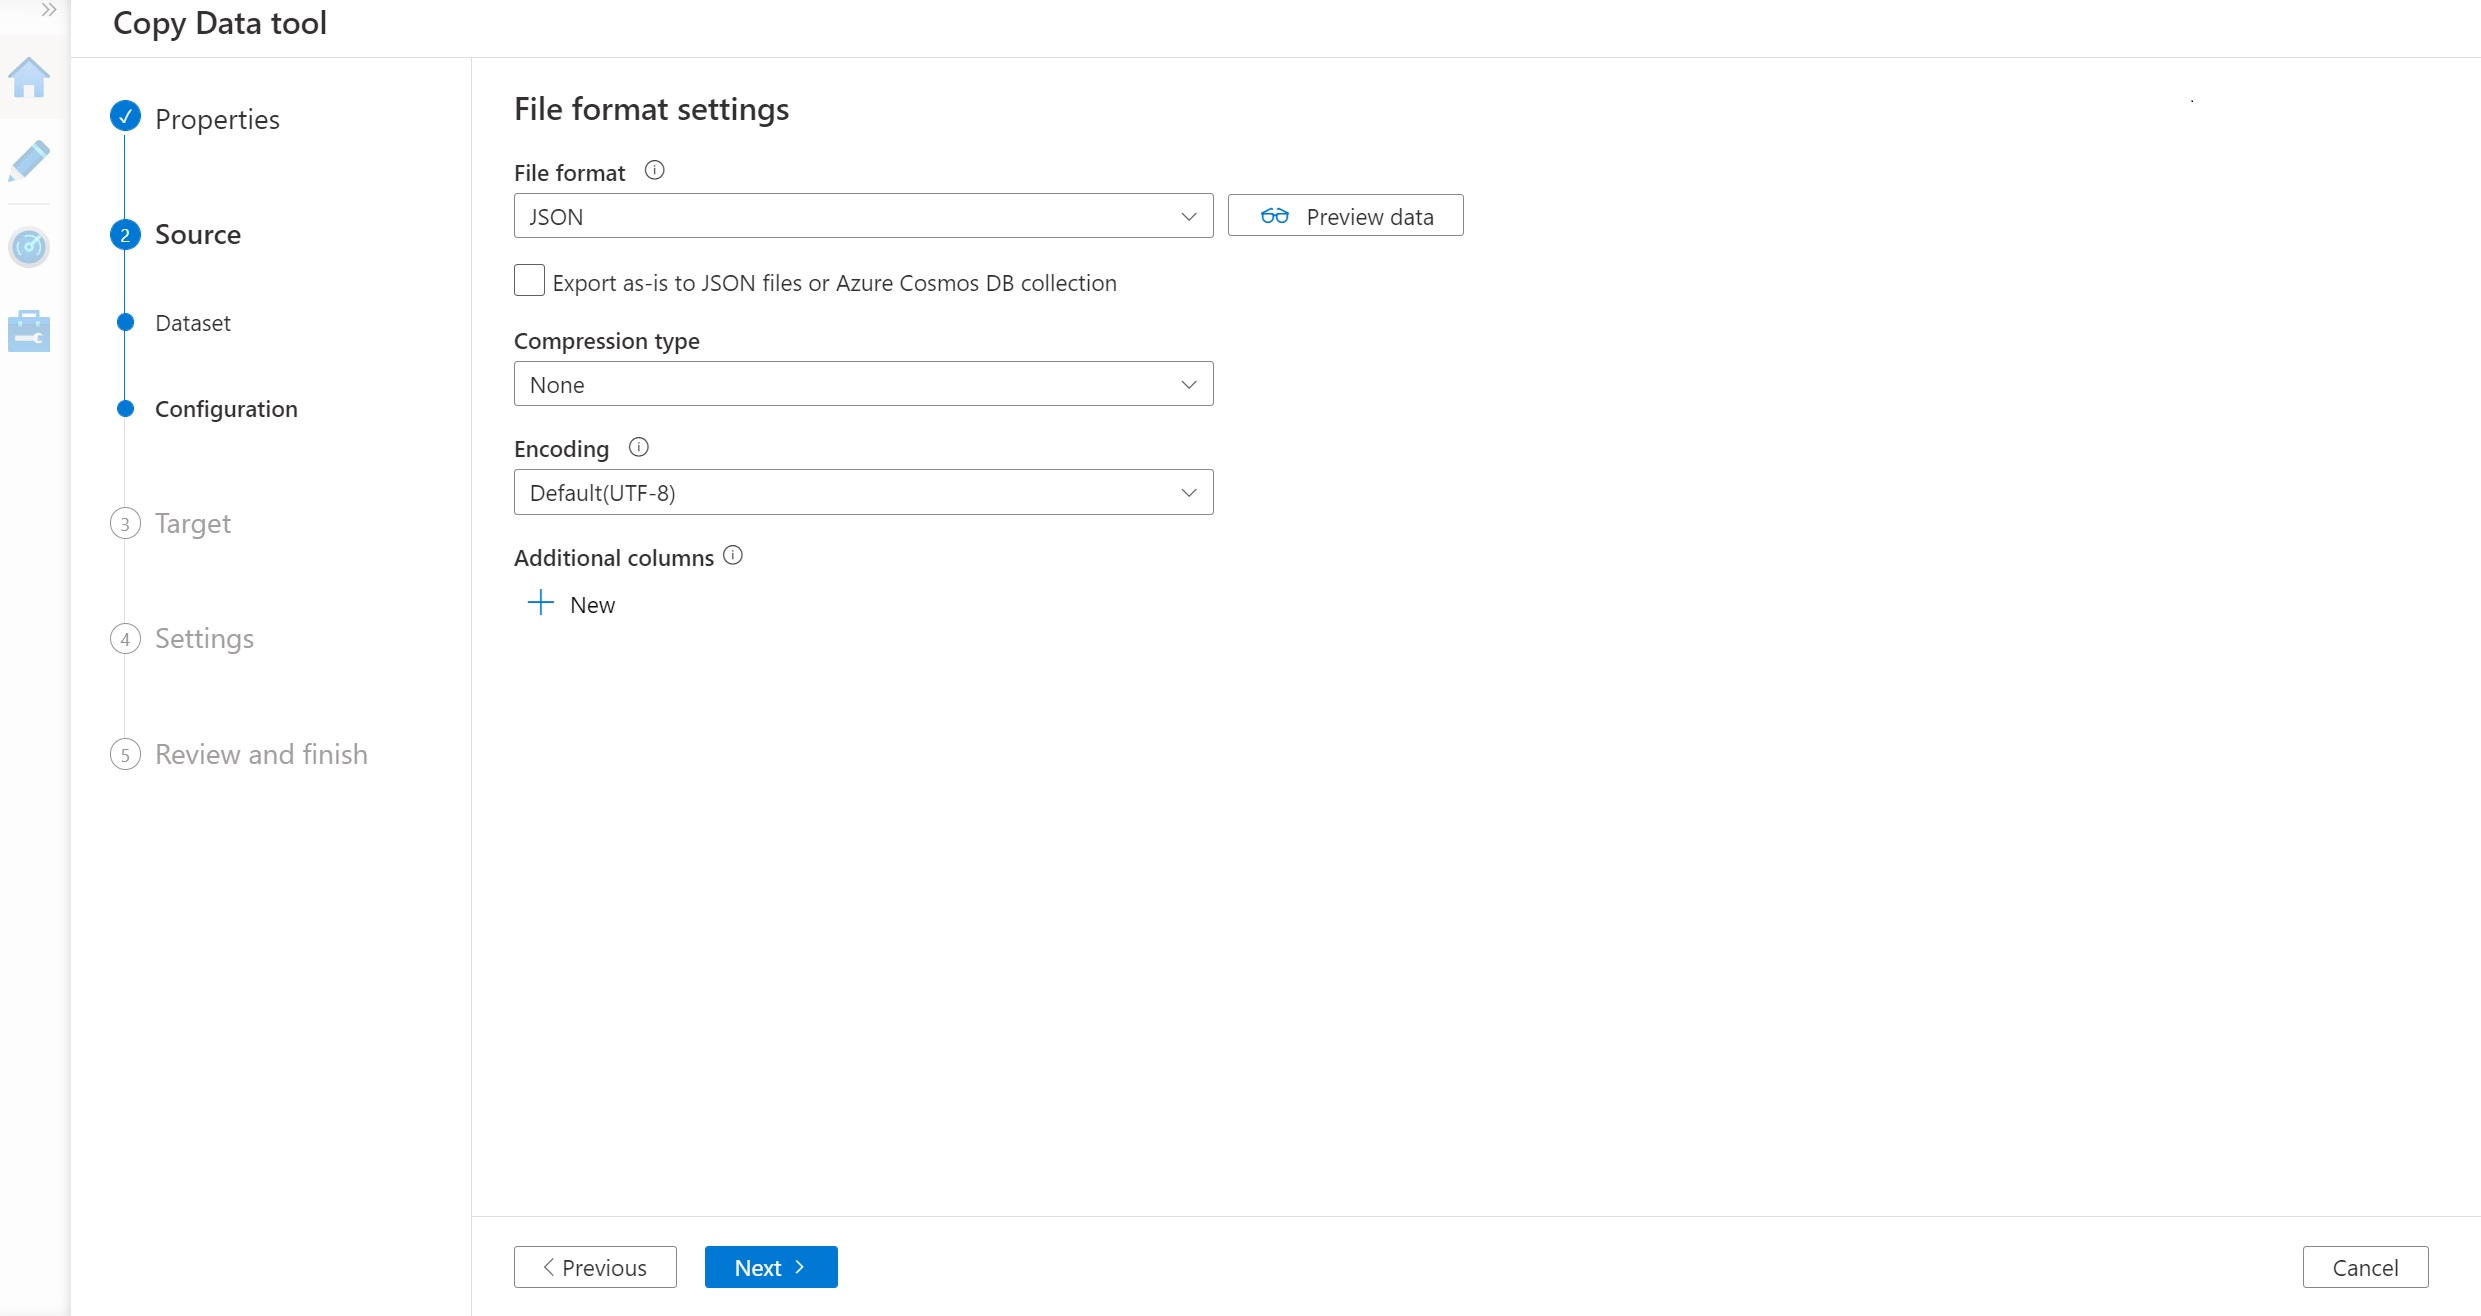
Select the file format as JSON format. Then select Next.
-
You have now successfully connected the Blob Storage container with the nutrition.json file as the source.
-
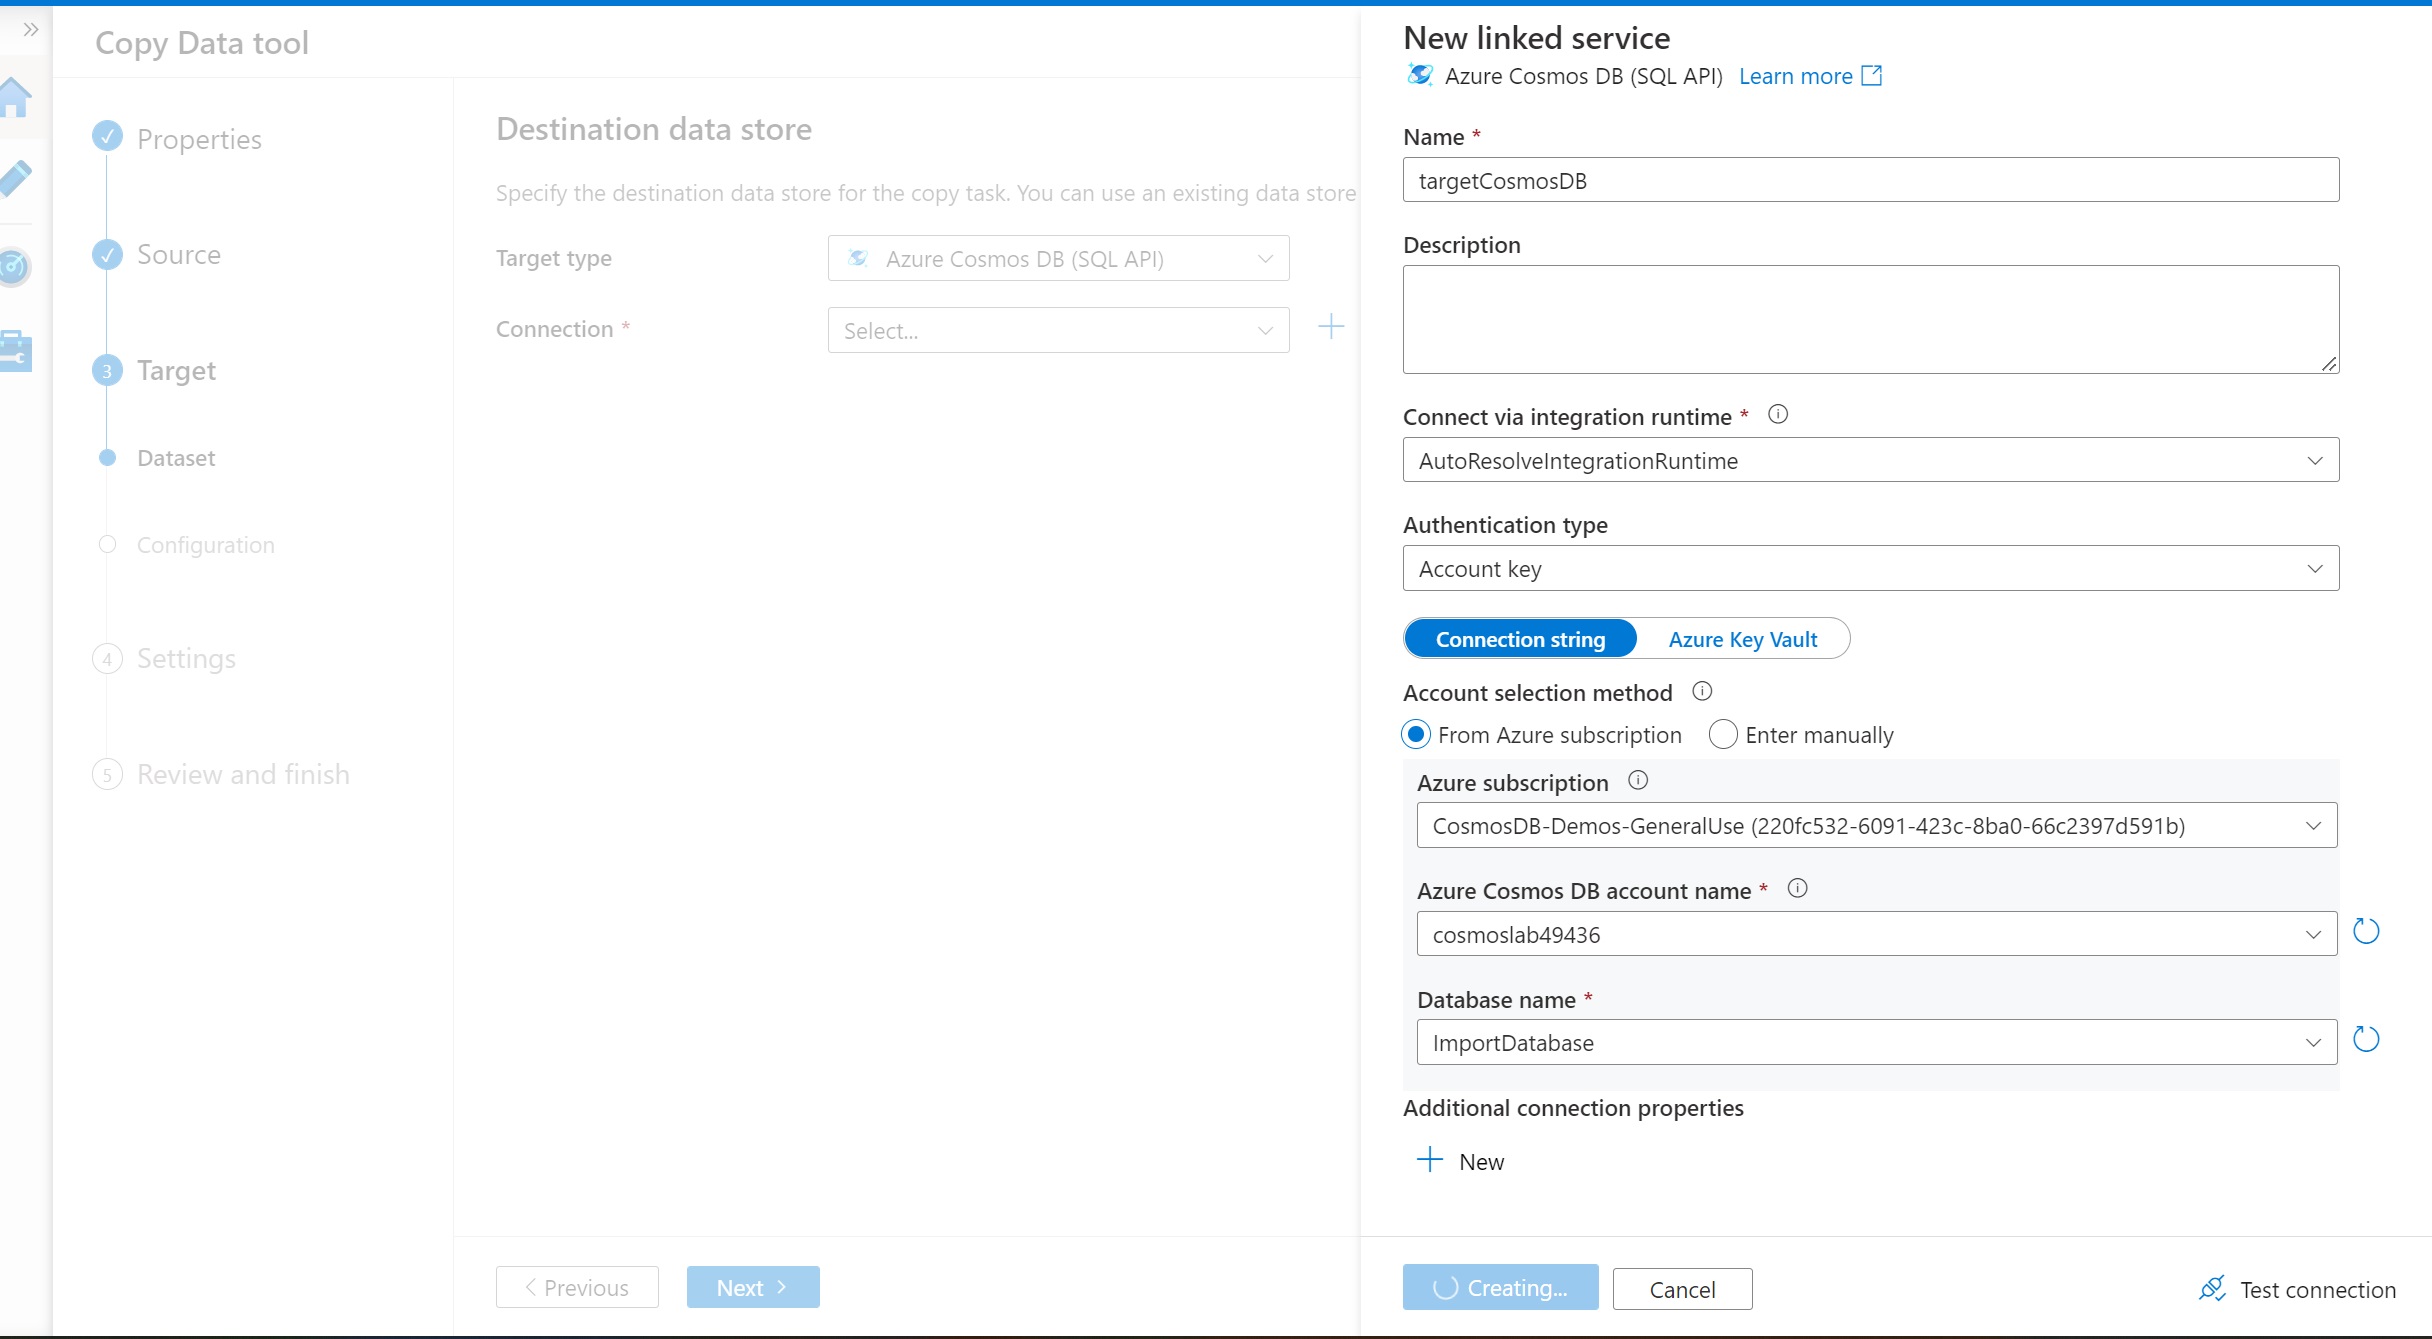
For the Destination data store add the Cosmos DB target data store by selecting Create new connection and selecting Azure Cosmos DB (SQL API).

-
Name the linked service targetcosmosdb and select your Azure subscription and Cosmos DB account. You should also select the Cosmos DB ImportDatabase that you created earlier.
-
Select your newly created targetcosmosdb connection as the Destination date store. Select your FoodCollection container from the drop-down menu. You will map your Blob storage file to the correct Cosmos DB container. Click Next to continue.

-
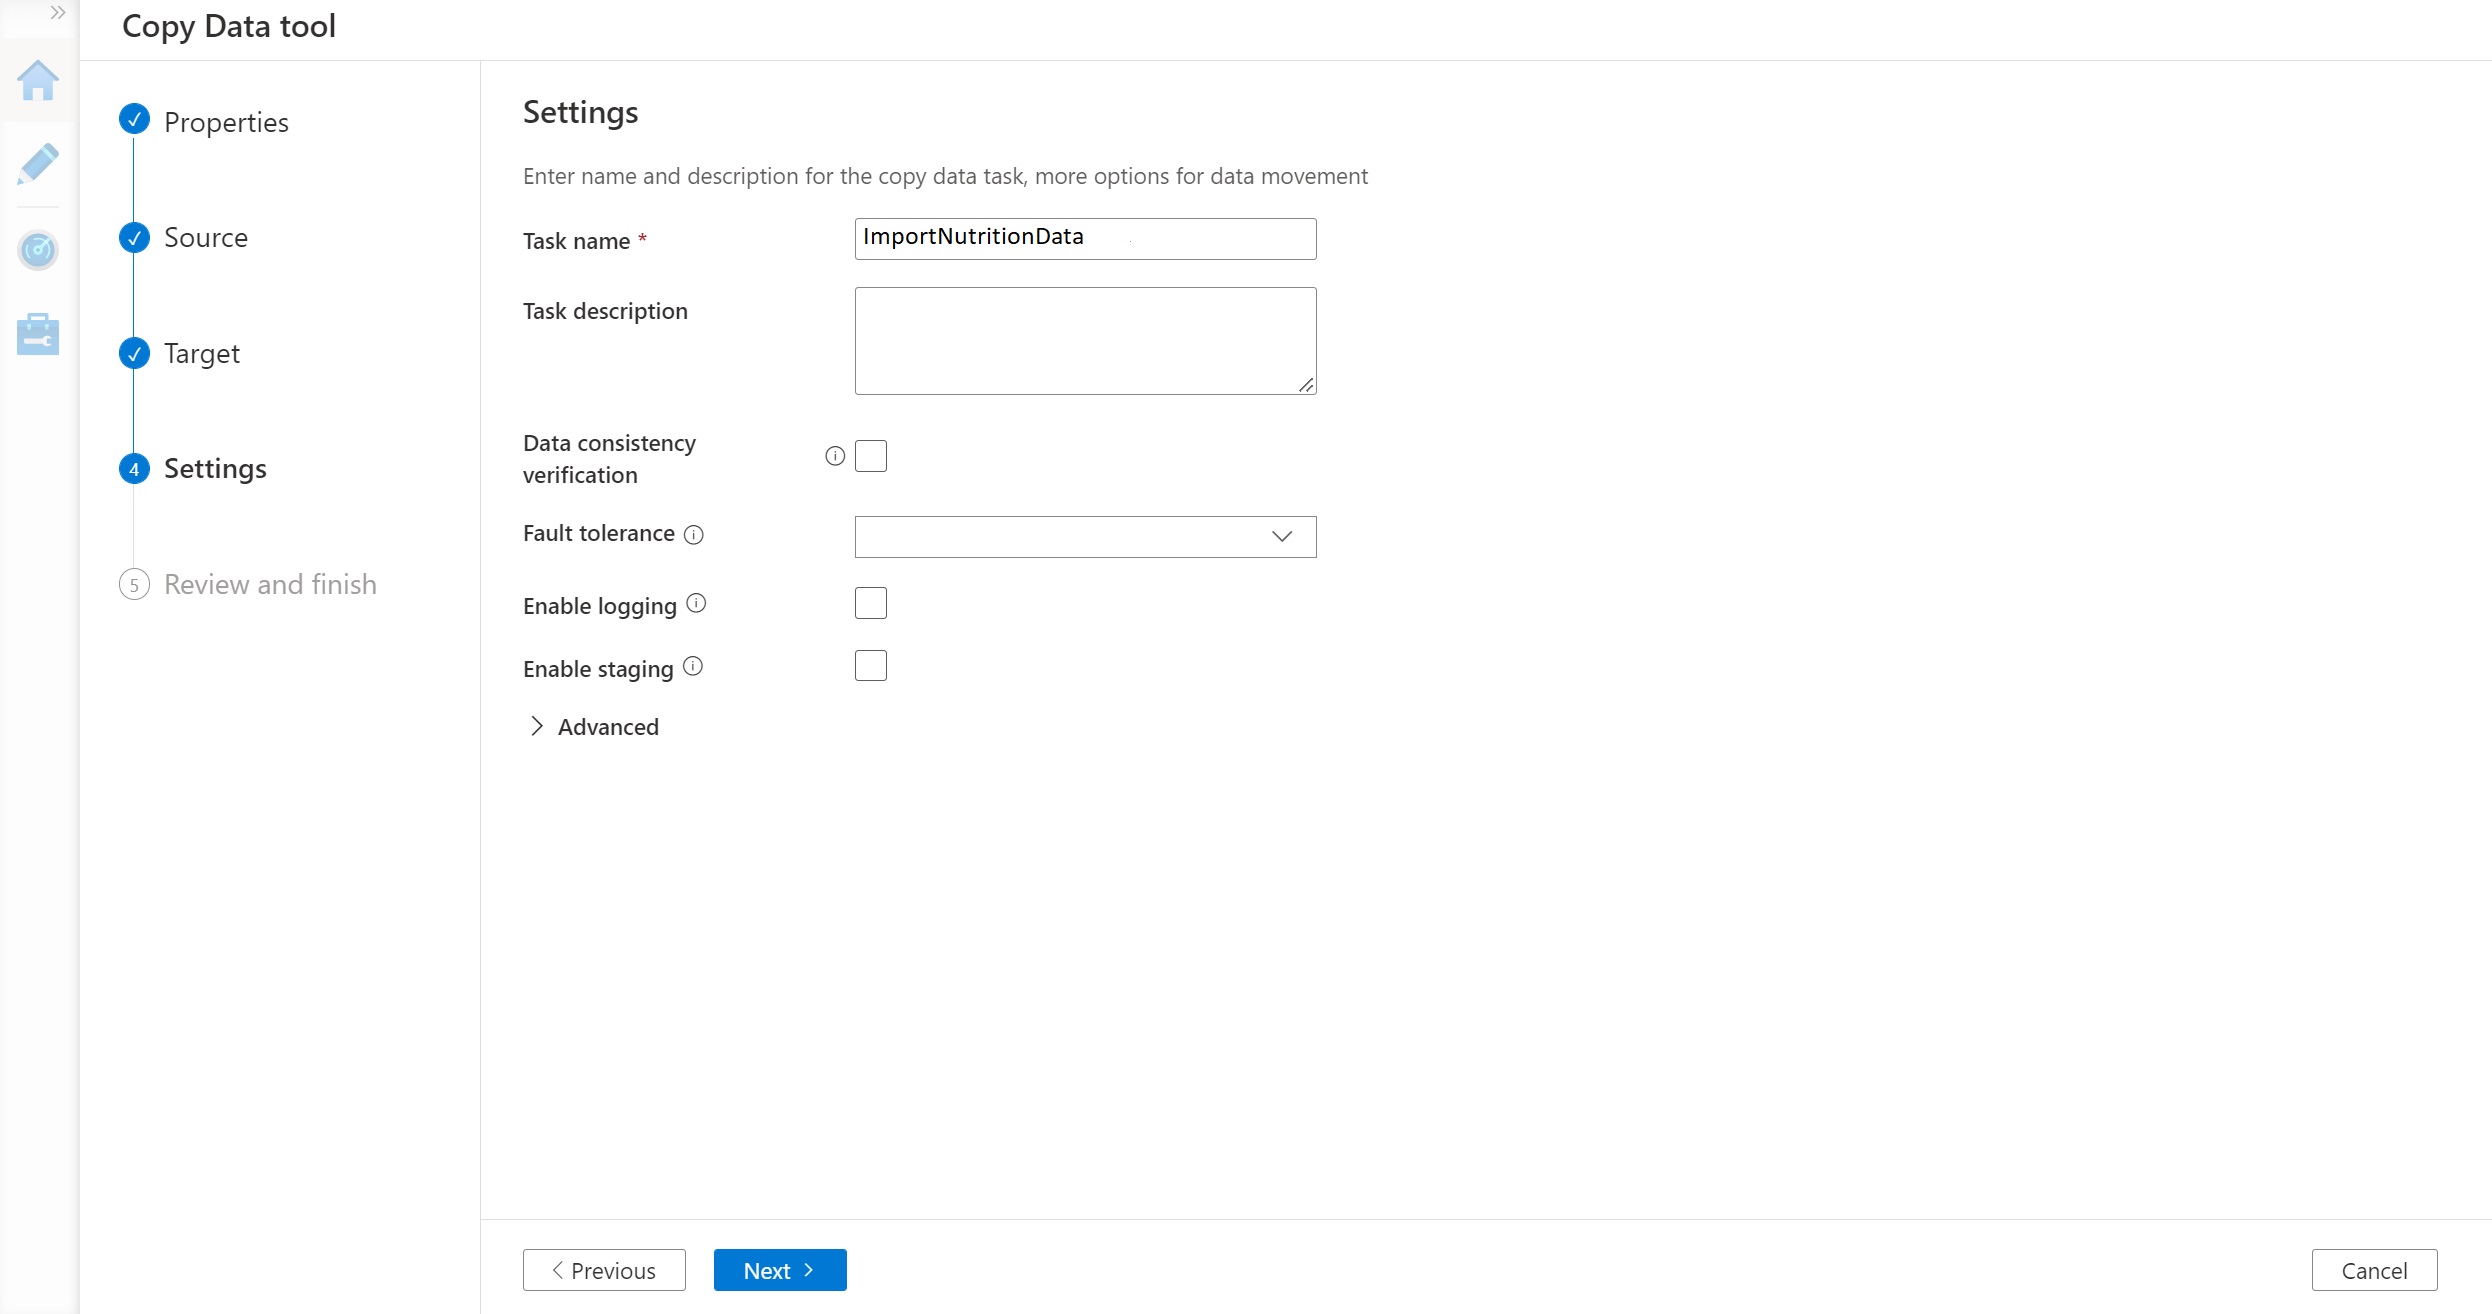
Name the task as ImportNutritionData. There is no need to change any settings.
-
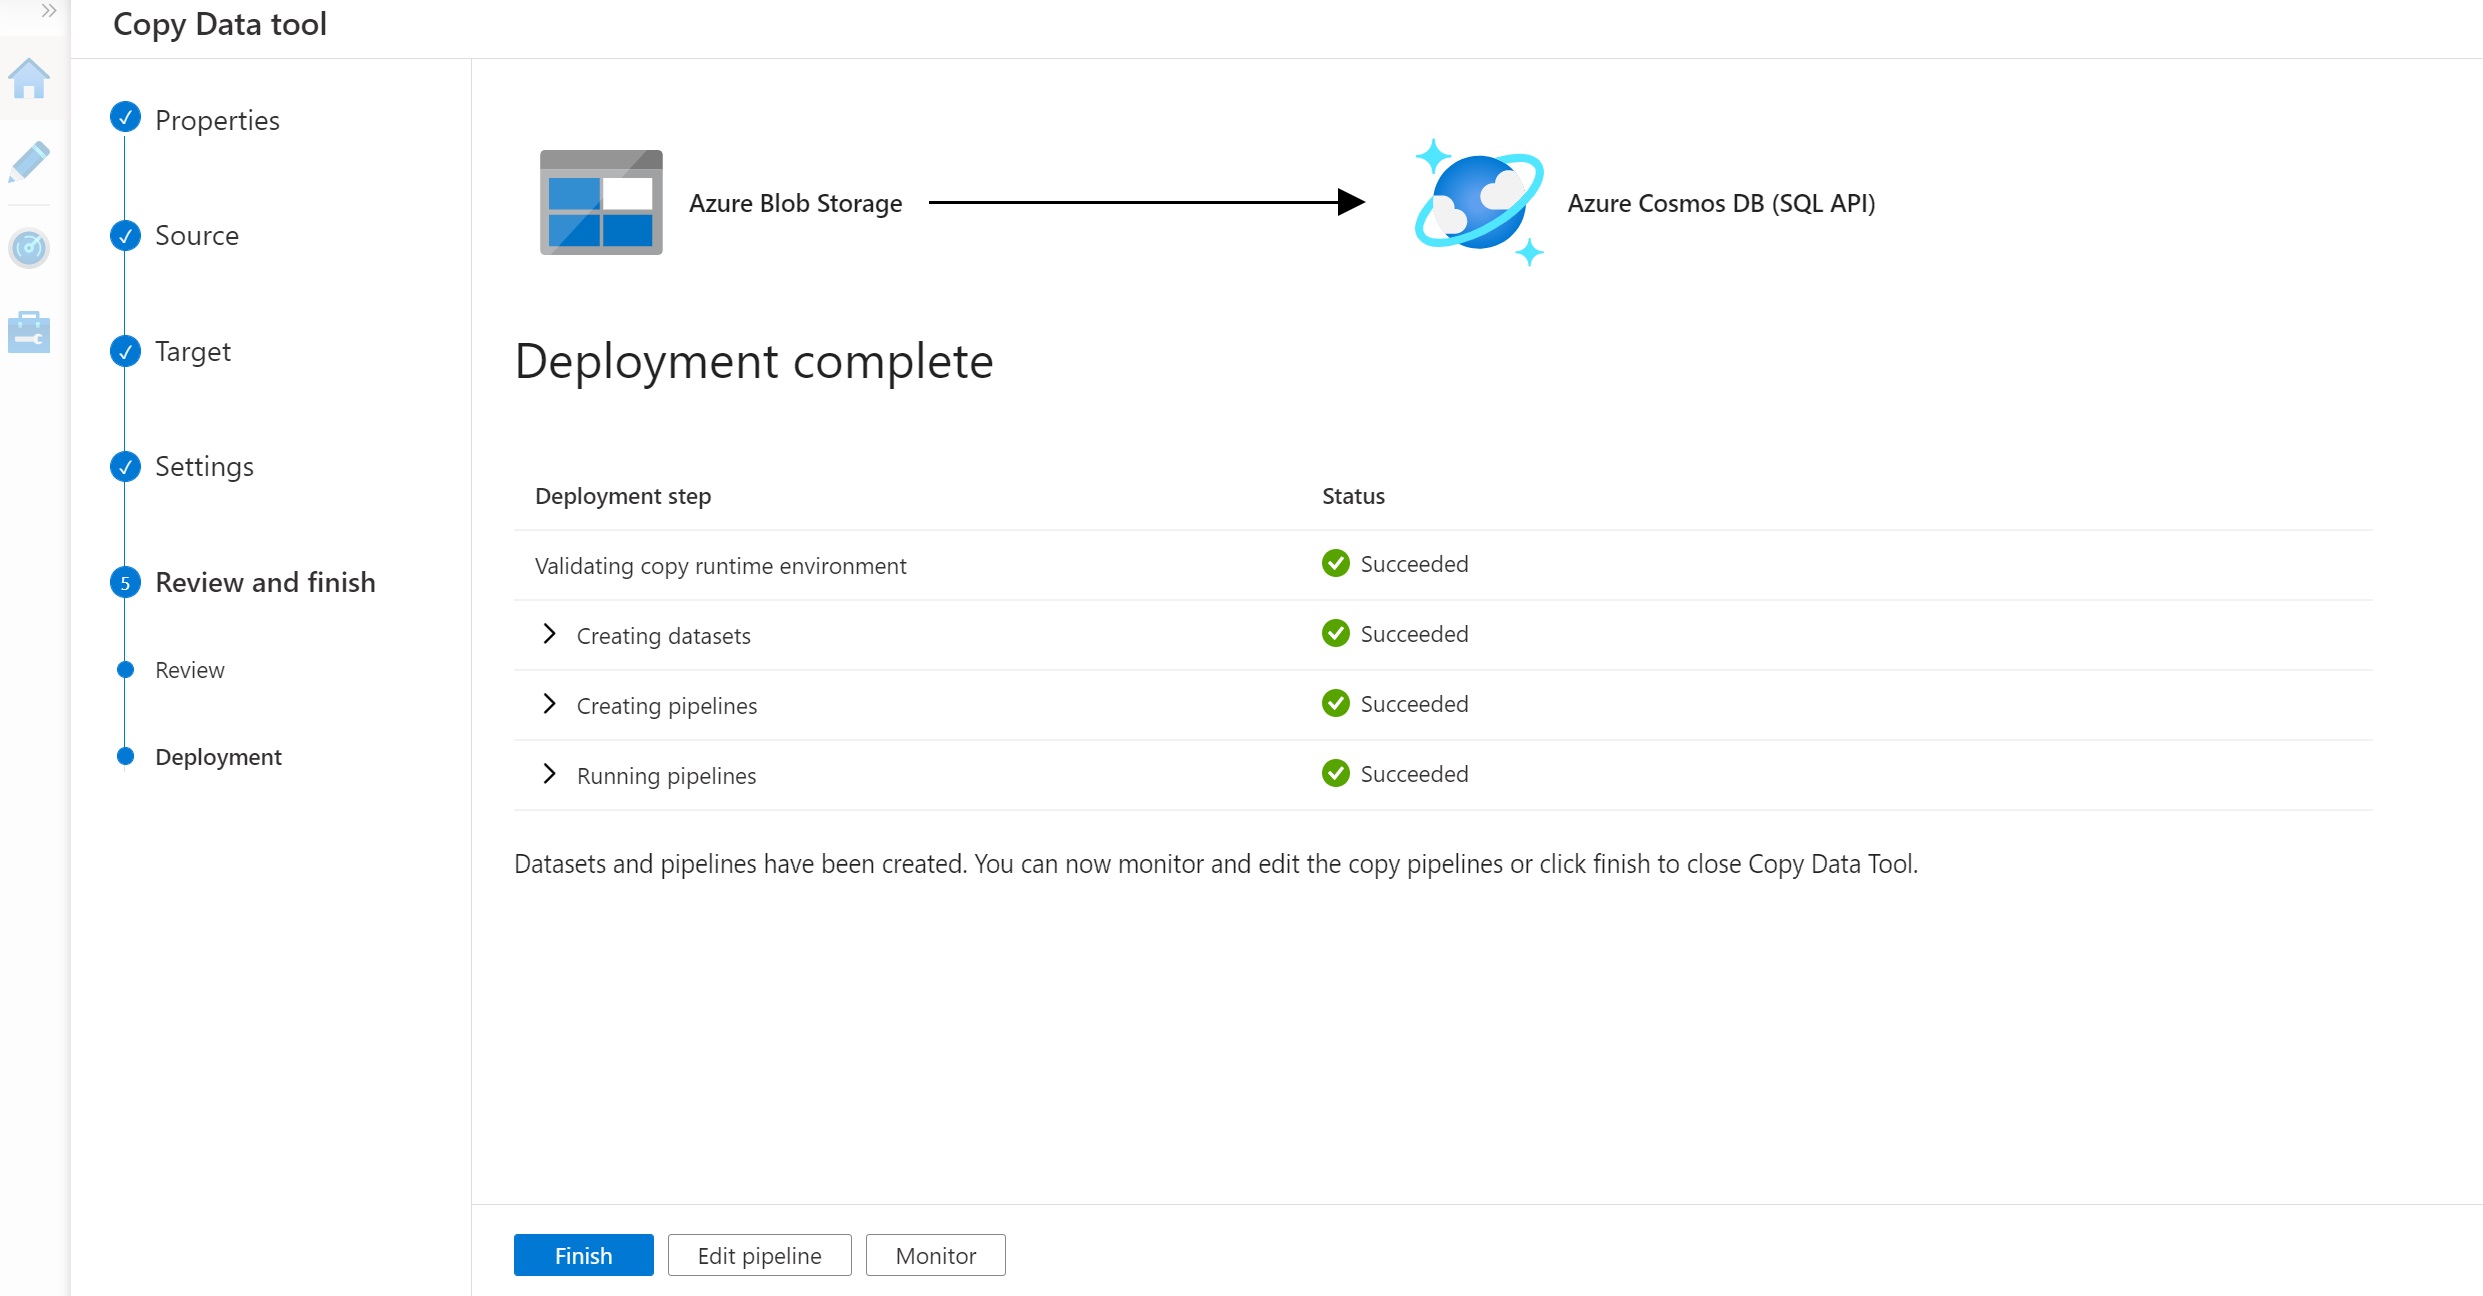
Click Next to begin deployment. After deployment is complete, select Monitor.
-
After a few minutes, refresh the page and the status for the ImportNutrition pipeline should be listed as Succeeded.
-
Once the import process has completed, close the ADF. You will now proceed to validate your imported data.
Validate Imported Data
The Azure Cosmos DB Data Explorer allows you to view documents and run queries directly within the Azure Portal. In this exercise, you will use the Data Explorer to view the data stored in our container.
You will validate that the data was successfully imported into your container using the Items view in the Data Explorer.
-
Return to the Azure Portal (http://portal.azure.com).
-
On the left side of the portal, click the Resource groups link.
-
In the Resource groups blade, locate and select the cosmoslabs Resource Group.
-
In the cosmoslabs blade, select the Azure Cosmos DB account you recently created.
-
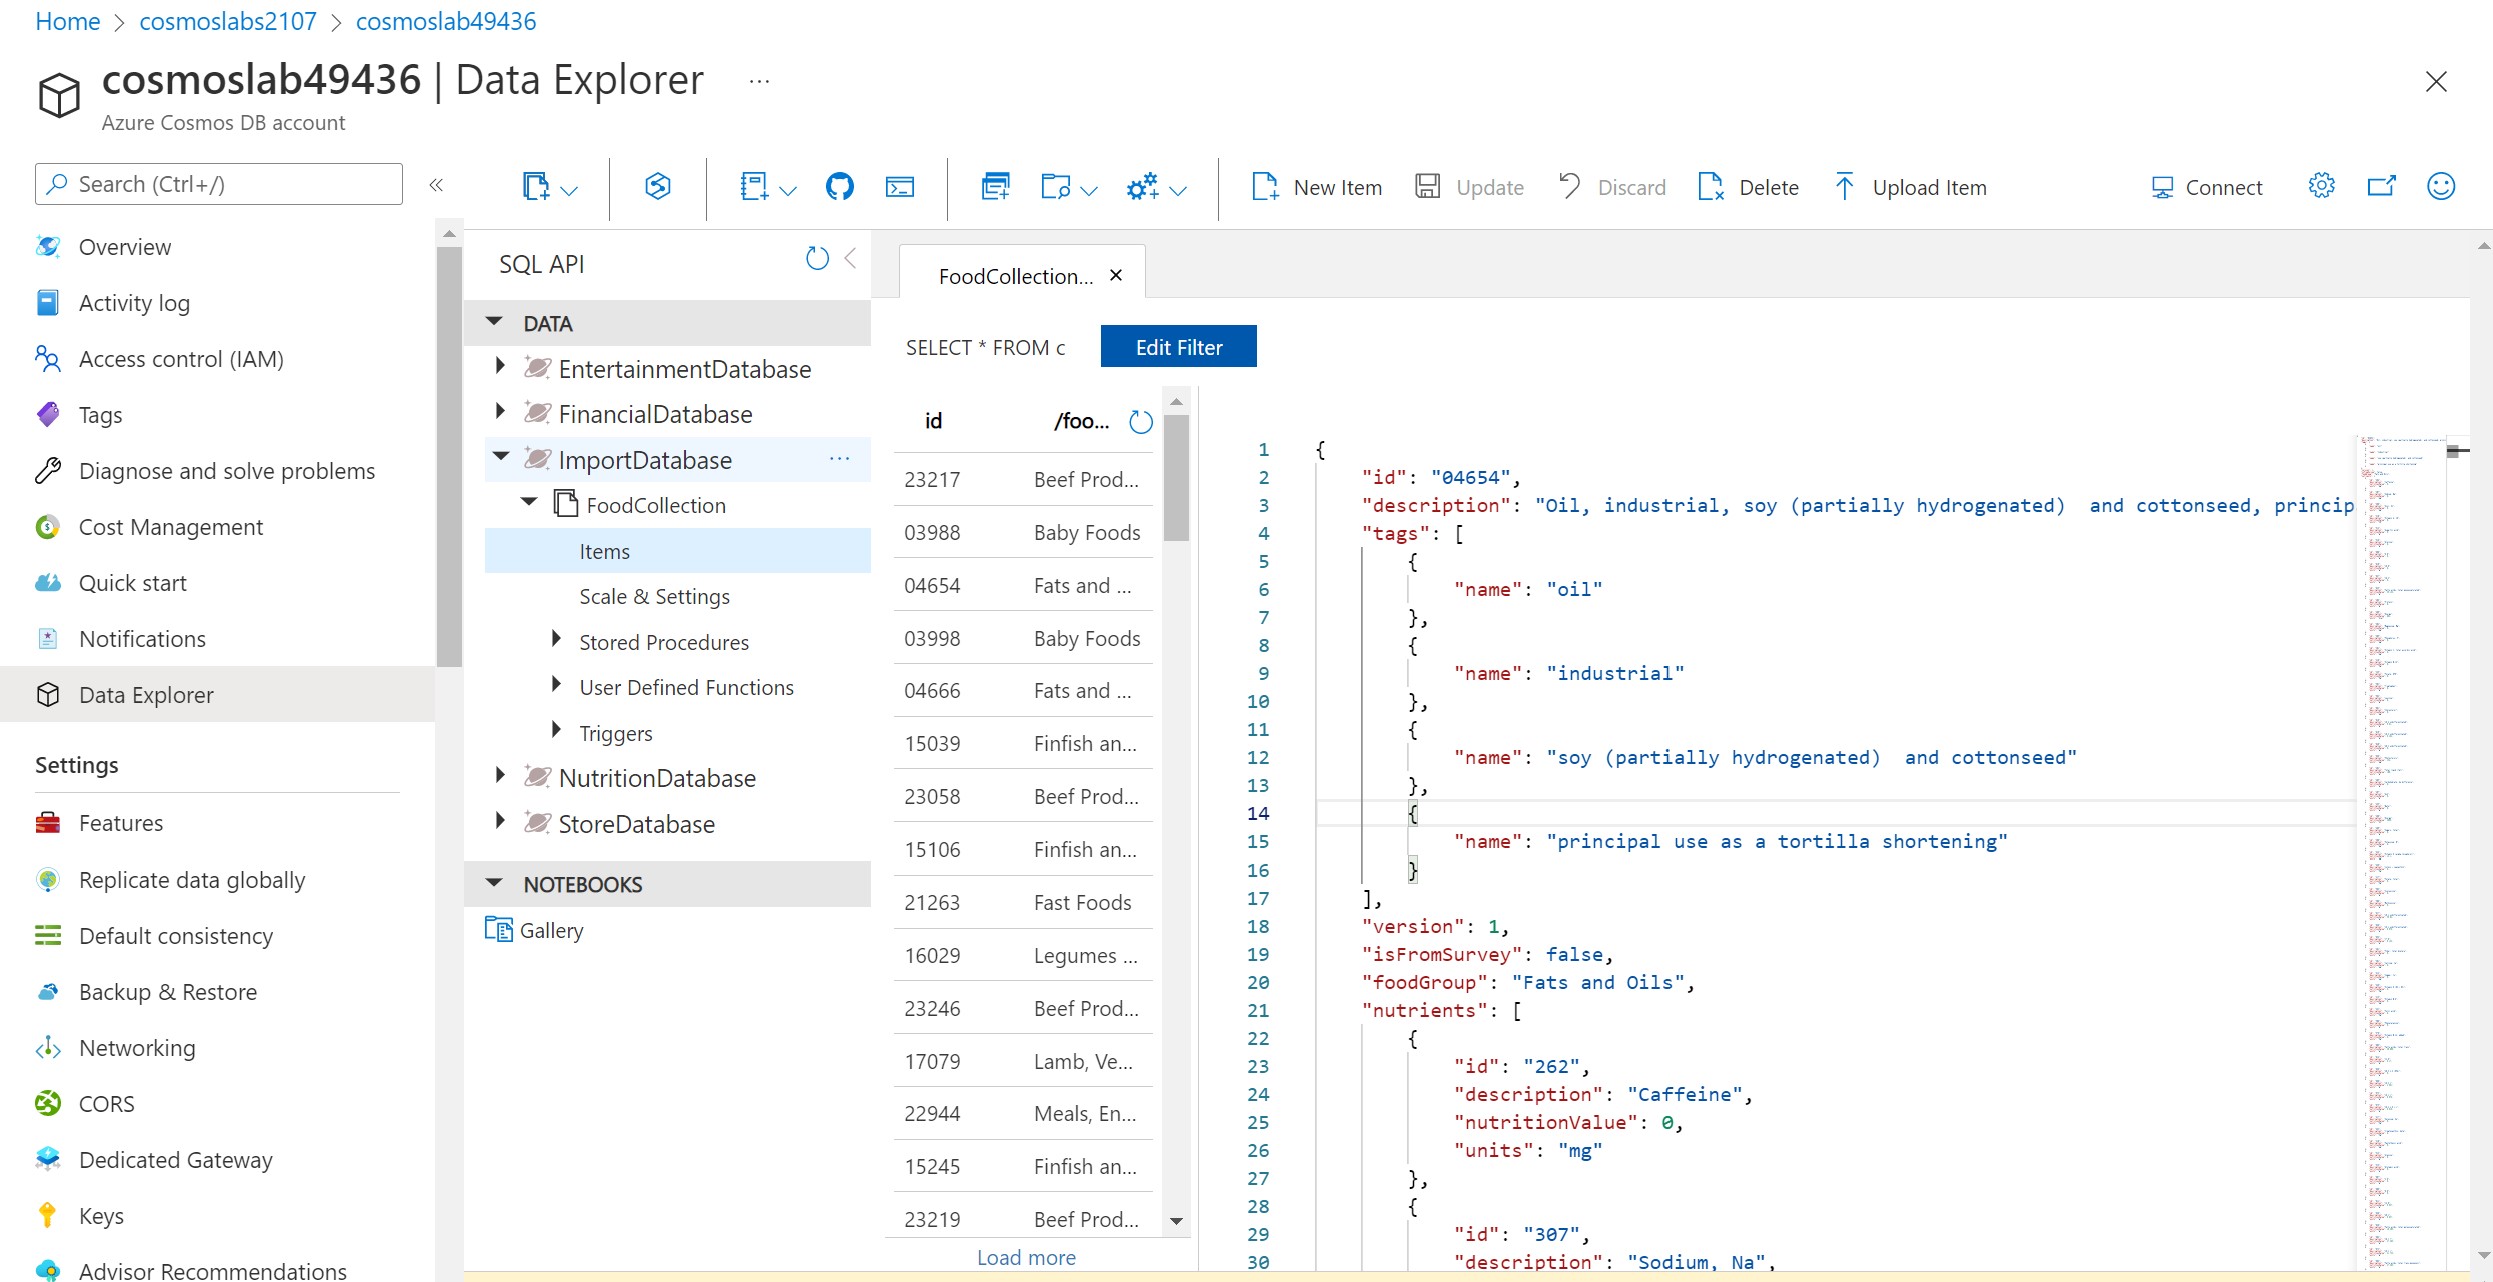
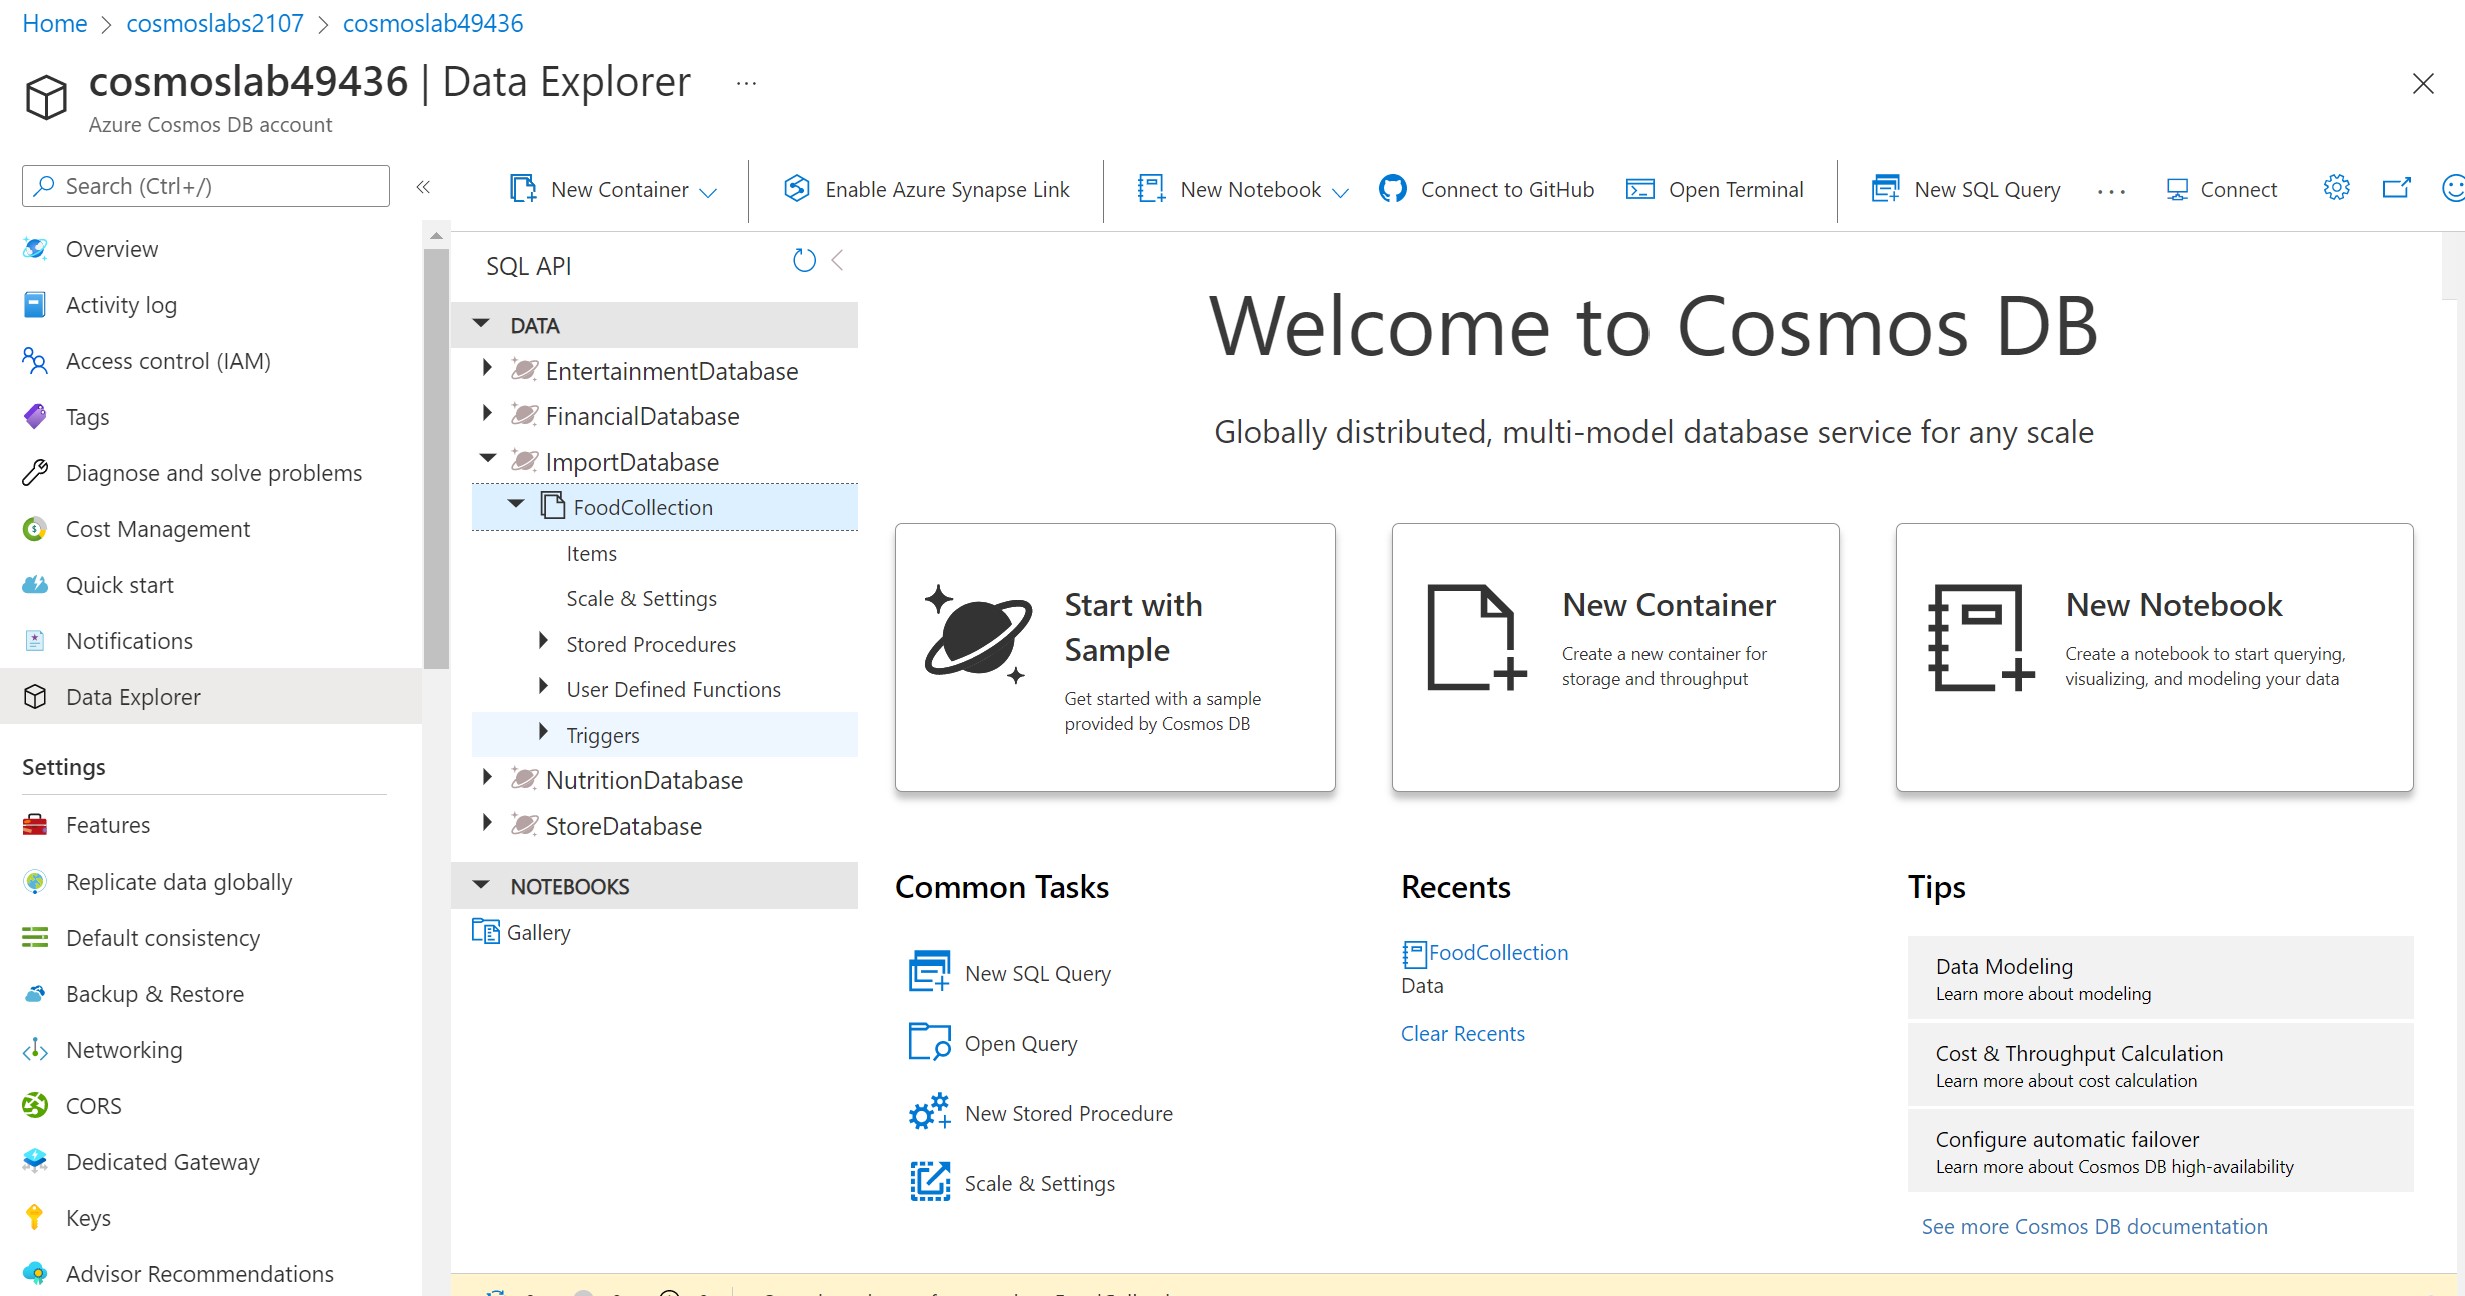
In the Azure Cosmos DB blade, locate and click the Data Explorer link on the left side of the blade. Expand the ImportDatabase database node and then expand the FoodCollection container node.
-
Within the FoodCollection node, click the Items link to view a subset of the various documents in the container. Select a few of the documents and observe the properties and structure of the documents.